Rebedding Chain Plates With Butyl Tape
My chain plates have started to leak badly, so it’s time to rebed them. This process closely follows Tom Keffer’s excellent project log on treefools.org with a few interesting twists.
I’ve been using Bed-It Butyl Tape for my bedding projects and highly recommend it. Bed-It is formulated specifically for marine environments, is slightly lighter in color (but still gray) than the stuff you might find at the hardware store, and is rolled relatively thin, which I find easier for bedding applications. I can imagine very few bedding applications where I’d go back to the 4000 I was using before. Don Casey has a great overview on different types of sealants if you’re interested.
Starting out
My Allied Seabreeze has 1 upper and 2 lower shrouds per side for a total of 6 chain plates. I gave quite a bit of thought to the most efficient strategy for this project. The ideal of course, would be to unstep the mast and rebed all 6 chain plates at once, but for me that wasn’t feasible. On the other hand, doing them one at a time would add a lot of time to the project since I live about an hour’s drive from the boat yard. I didn’t like the idea of removing more than 2 plates at a time. So in the end, I worked in stages: lower shrouds on the starboard side, upper shroud once the lower ones were reattached, then repeat on port side.
Except where noted, the pictures here are taken on the port side, by which I’m I’d already completed the starboard side. You may also notice that the toe rails are missing. At this point, they are in the process of being replaced.
Step 1: I tied my 2 halyards to the nearest cleats or stanchions to steady the side I was working on and winched these down as tight as I could.

Step 2: I measured and recorded the distance of my turnbuckle bolts before loosening them. Assuming your rig is reasonably tuned, this is important so you can restore it to its original state.
Step 3: Loosen the turnbuckle and remove the pin attaching it to the chain plate. Use crescent wrenches for this; do not use a screwdriver, which stresses the turnbuckle. Remove the pin on the opposite end that attaches the turnbuckle to the shroud and lash the shroud(s) to the mast.
Note: try to keep the parts of each turnbuckle and chainplate assembly together as you remove them and label them with tape. In my rig each chain plate, backing plate and corresponding set of fastener bolts are all different. This will save a lot of time and guess work down the road.
Step 4: Remove the fastener screws on the chain plate covers. These will easily get lost, so have a cup or an old vitamin bottle ready to hold them. You might also consider replacing these with new hardware as the heads can get damaged.
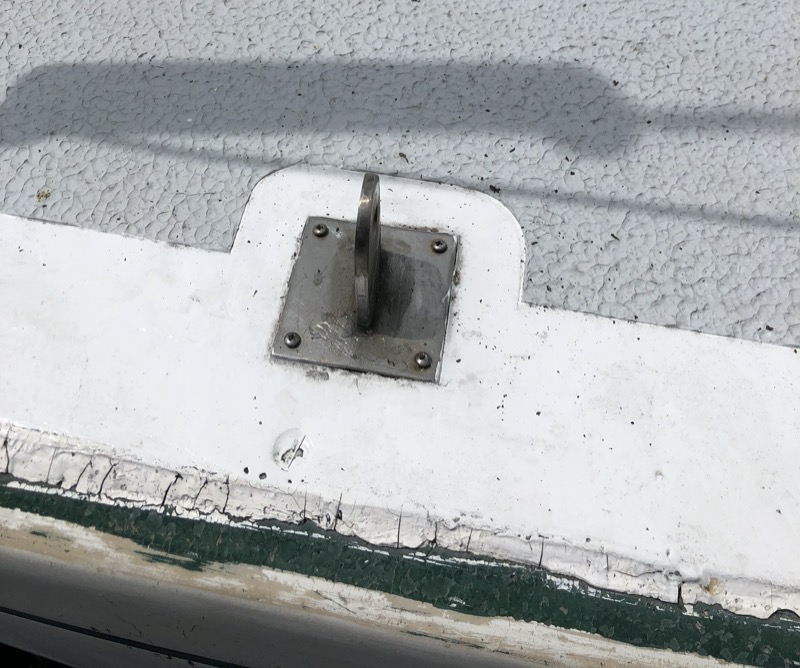
Step 5: Patiently work loose the chain plate covers and remove them. Unless you don’t mind wrecking your deck paint this requires quite a bit of patience. I used the thinnest paint scraper I could find to slowly and gently break through the old (4000) sealant and avoid as much as possible scraping into the paint. Also avoid putting to much pressure on the cover itself until the sealant has lost its hold. Even stainless covers will bend if they are thin, and will need to be reflattened again later.

Once the cover is removed you can take these home and remove all the old sealant and other crud however you like. Here you can see I once attempted to temporarily seal this chain plate from above with silicone: a poor decision I won’t repeat :)

Step 6: Time to remove the chain plate. This of course needs to be done from within the cabin and typically means partially reorganizing and possibly disassembling stuff in your living quarters. In my case, I’d already done this as part of the toerail progject so it was no big deal. Otherwise, this can be a major hassle.
This step of the project can be notoriously difficult. On the Seabreeze the chain plates were originally glassed to the hull making inspection much less removal a daunting task. Even then, chain plates are often difficult to reach, and removing them involves work in cramped conditions at odd angles. I consider myself very lucky. On my boat the chain plates appear to have already been replaced with 316 stainless steel at one point, and the glass was removed to do so. It was a relatively easy (but still arduous) matter of removing the 3 bolts holding each plate in place.
Again, keep track of your hardware and keep each assembly together if you can. Be sure to note which side of the chain plate faces the bulkhead or whatever it is mounted to. There’s a good chance that if you try later to install it backwards or mix up your plates, things won’t fit.

Step 7: Remove remaining sealant from the deck, chain plate and hardware. 4000 comes off easily enough with a paint scraper and perhaps a bit of fine sandpaper. Looking at the deck it becomes obvious that a previous owner replaced the chain plates at some point; those holes look a bit nasty. However, with the chain plate in place it’s actually not too bad, at least on the port side. So I don’t think I’ll do much to repair the holes in this case. The starboard side, which I did previously, was another matter (see next page).

After repeating these steps for the other lower shroud on the port side, that’s enough for one day. I cut a temporary cap from some old plywood and afixed it over the chain plate holes with hardware store grade butyl tape to prevent rain from getting in until I could return later.

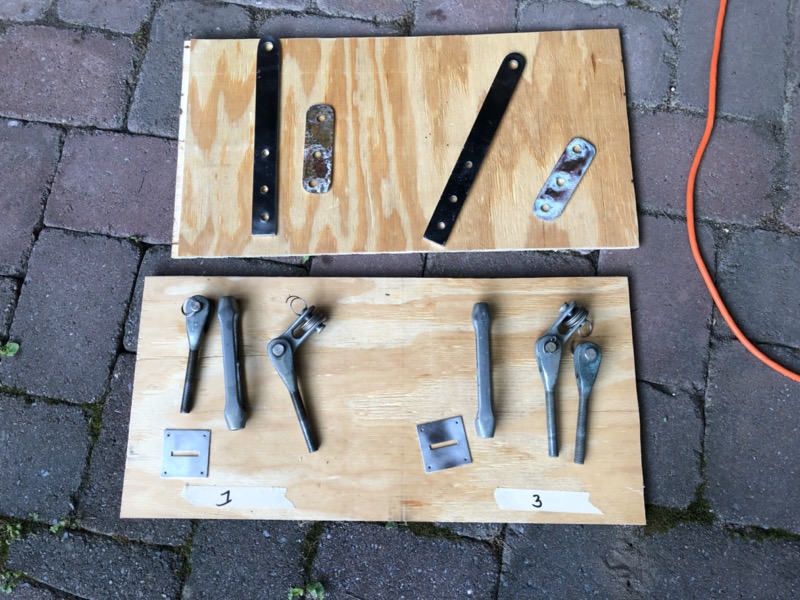
Back at home, I cleaned up the chain plates and covers, removed old sealant and tarnish, etc. This is an excellent time to inspect the chain plates and fasteners for damage and make replacements as necessary. I’m always surprised at how far a 3M ScotchBrite pad and water will go in cleaning up metal parts. If that doesn’t do it then I add a bit of an oxalic acid-based cleaner such as Bar Keepers Friend. Perfection isn’t necessary; I only need to clean the parts enough to expose possible failure points. But a good shine always looks nice anyway. I also disassembled the turnbuckles and quickly cleaned everything with a ScotchBrite pad; for some reason the bolts got rather dirty.
Fixing my Chainplate Holes
While the chain plate cutouts through the deck were reasonably snug on the port side, for whatever reason the ones on the starboard side were another matter. There were major gaps all around the chain plate, too much to reasonably fill with butyl tape or any other sealant. No wonder they were leaking!

Time to break out the epoxy. I’ve recently been fixing a lot of cosmetic dings using the no blush epoxies that Paul Oman sells. Really great stuff. For this job I used the winter cure hardener thickened with fumed silica. Normally the winter cure isn’t recommended above 50 degrees or so, and the temperature this day was nearly 80. But since I’m making a very small batch and as long as I work very quickly (I’ll only have a few minutes), I can get away with it, and it will fully cure within a couple of hours. If that’s living too dangerously for you, use the standard or the summer cure.
Normally filling a deck hole of this size with epoxy would be fairly straight forward. The challenge here is that I need to somehow leave a cutout for the chain plate. If I fill the hole in completely then I’d just have to drill and file out space for the chain plate, based largely on guess work, and I might not be any better off than when I started.
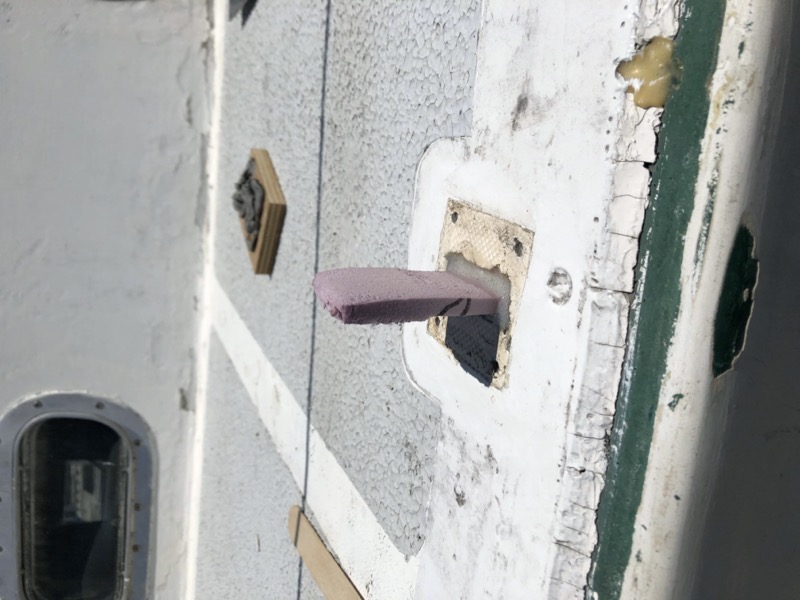
My solution was to cut a plug out of XPS foam to create a cutout for the chain plate. XPS foam is used for insulation and can be bought at most hardware stores. A friend had some scraps so I didn’t have to buy a 4x8’ sheet. It turns out the 1.5” thick sheets were exactly the width of the my chain plates! So I rough cut some approximately 1/4” slabs with a hobby knife and sanded them down until the thickness matched that of my chain plates.

Note: do not use styrofoam for this; it will disintegrate when it comes in contact with the epoxy.
The next challenge is to get the cutout properly positioned in the middle of the opening. If the hole is small you can probably just eyeball the cutout’s location. But if the hole is especially large you risk putting the cutout in the wrong place or twisting it out of alignment. The best way to get the right position is to temporarily bolt the chain plate back in place and mark its position with a shim or small ruler. After the chain plate is removed, the shim provides a guide for correctly positioning the cutout.

Then I sealed the hole from beneath with painter’s tape or duct tape. That keeps the epoxy from running through the opening into the cabin and provides a base for the cutout to rest upon and stick to. Back on deck, I placed the cutout in the hole using the position guide made sure it stuck to the duct tape underneath to hold it in place, and removed the guide.
Next, I mixed up my epoxy using fumed silica to get to a peanut butter thickness. It’s important to make sure the cutout remains fairly straight in the hole as the epoxy is flowed in.
Once the epoxy has fully cured simply cut the foam out with any sharp object and lightly file away any remaining bits.
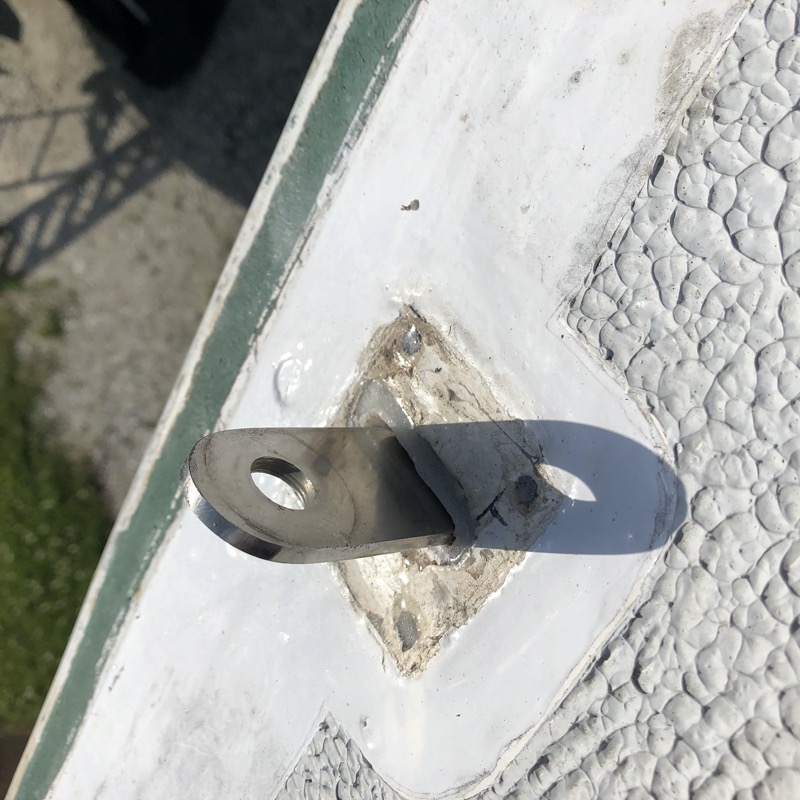
Finally, I cut a slight countersink bevel around the hole with a Dremel.
Here is the final result with the chain plate in place (I had not yet cut bevel at this point).
Replacement and Installation
Every boat is different, and I’m sure the process of installing and sealing the chain plates is different for everyone, but here’s what worked for me.
My first step was to Dremel out the screw holes that held the chain plate covers in place and fill them with fresh epoxy. If your fiberglass is thick enough you can just bore out the old hole with a grinding bit, but you might also opt to drill all the way through the deck. In the latter case, you’ll need to tape the bottom of the hole so the epoxy doesn’t drip into the cabin. Plastic syringes like the kind you use to give medicine to pets are nice tools for filling these little holes; a swizzle stick as a sort of mini-spatula also works well.

The next step is to reinstall the chain plates. Depending on the location, this can be much easier said than done.
That’s it for today. I want to allow the epoxy to cure overnight before drilling pilot holes and installing the chain plate covers. There’s a tropical storm coming up the coast, so I’d really like to have the stays back in place, even without the covers. I reattach them, temporarily seal the deck with hardware-store grade butyl and wrap up for the day.

After the epoxy has fully cured I can finish the installation. I’ve seen a couple different ways to do this, but what works for me is to simply drill very thin pilot holes with a Dremel and a 1/32” drill bit. 1/16” or larger is already too big, and the screws that hold the chain plate covers in place end up stripping (I tested this in my workshop). The chain plate cover itself needs to serve as a guide, so temporarily tack it in place with a bit of (what else?) butyl tape so it doesn’t slide around while you drill the holes.
Next, it’s time to apply the butyl tape, both to the bottom of the chain plate cover and the area around the chain plate itself. The butyl tape will want to stick more to your fingers than to the metal; an easy fix for this is to use the wax paper to press the butyl in place. I try to get the tape as flat as possible and cover the entire area of the bottom of the chain plate cover, but provide plenty of sealant around the chain plate.

Next, thread the screws into place and through the butyl tape on the bottom of the chain plate cover, and start to turn the screws into the pilot holes, but don’t tighten them down yet. Then reattach the turnbuckle to the chain plate and tighten it back to its original position (you recorded that with calipers when you first started, right?). This may be just me, but it makes sense that the chain plates be sealed while they are under at least some load to avoid stretching the seal later. Don’t forget to reinstall the turnbuckle covers if you have them.
Finally, screw in the fastener screws, applying a few turns to each screw in sequence so the plate tightens down evenly across all four corners. The butyl tape will start to seep out of the seems (and will continue to do so over several days), and in your leisure time you can cut away the excess with a plastic putty knife or other soft but stiff edge.
