Replacing Thick Rub Rail Sections on a Transom Corner
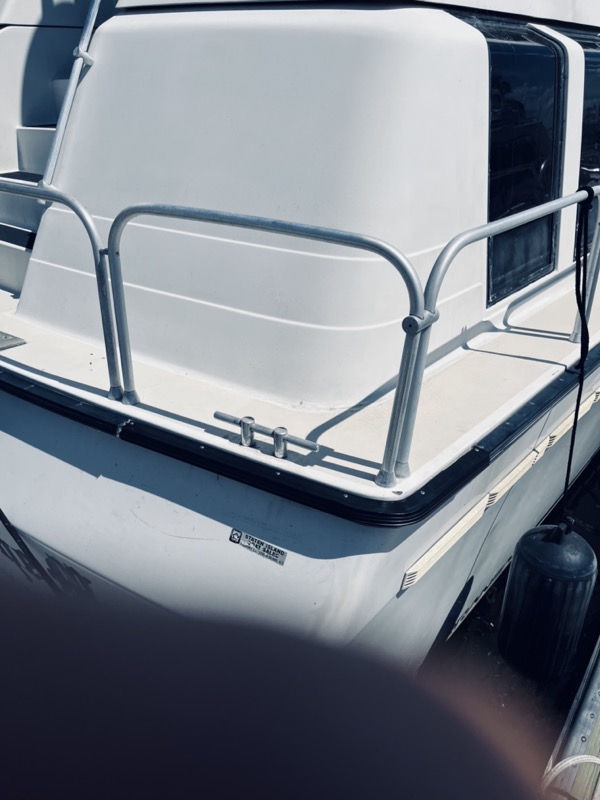
A client asked me to make several repairs to his 1989 Mainship Mediterranean. One of the projects involved replacing a couple of sections of rub rail that had suffered impact damage and mostly gone missing.
The challenges in this case were: 1) finding a source for the rub rail, and; 2) bending the rub rail around a sharp transom corner, especially since the boat was a “live aboard” and thus on the water.
Finding parts for older boats—particularly where the manufacturer has gone out of business—is often a challenge. In this case I needed rigid vinyl rub rail that matched the existing material, in black. The only source available was Integrity Marine and the smallest length they would sell was 25 feet. Even worse: shipping a 25-foot would cost at least $1,300! Fortunately, Integrity was willing to cut the material down to a length that met UPS’ standard shipping dimensions, so I requested 3 7-foot sections and 1 4-foot section, and shipping came down to around $50.
One of the two sections to be replaced was around the starboard corner of the stern transom. The corner radius was approximately 3.5” and the rub rail itself was around 1.75” thick. Pretty tight! Given the amount of force and heat necessary to bend that much material on that tight of a turn, I didn’t want to bend the rail on the boat itself where I would risk damaging the fiberglass hull. Furthermore, the boat was on the water (a live-aboard) and I have a thing about doing delicate work with power tools on a boat that’s pitching around in its berth.
I decided to trace the contour of the transom corner onto acetate, which I could cut out to create a form in my workshop. The form was simply a piece of 1/2” MDF cut with a jigsaw, with matching pieces of common 2x4 screwed above and below to provide strength and thickness.
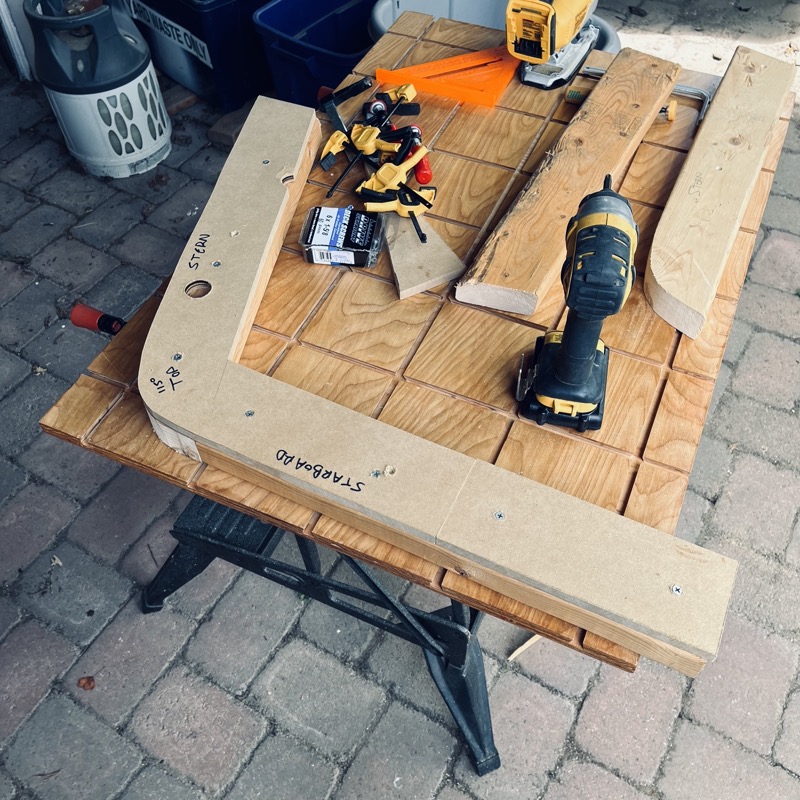
I also cut a set of jigs to match the shape of the rub rail so my clamps could hold the rail firmly against the form. I glued some carpet scrap on the inside of the jig to prevent scratching the rail. And I attached some aluminum flashing around the corner of the form so that my heat gun wouldn’t scorch it.
Then I clamped the form in place and started bending the rail. It was so thick that it took several minutes with the heat gun to get the rail warm enough to bend. And because of the rail thickness and the tight corner radius, I had to bend just a bit at a time so that it wouldn’t pucker too much (it puckered nonetheless, and I pushed it back in place by hand).
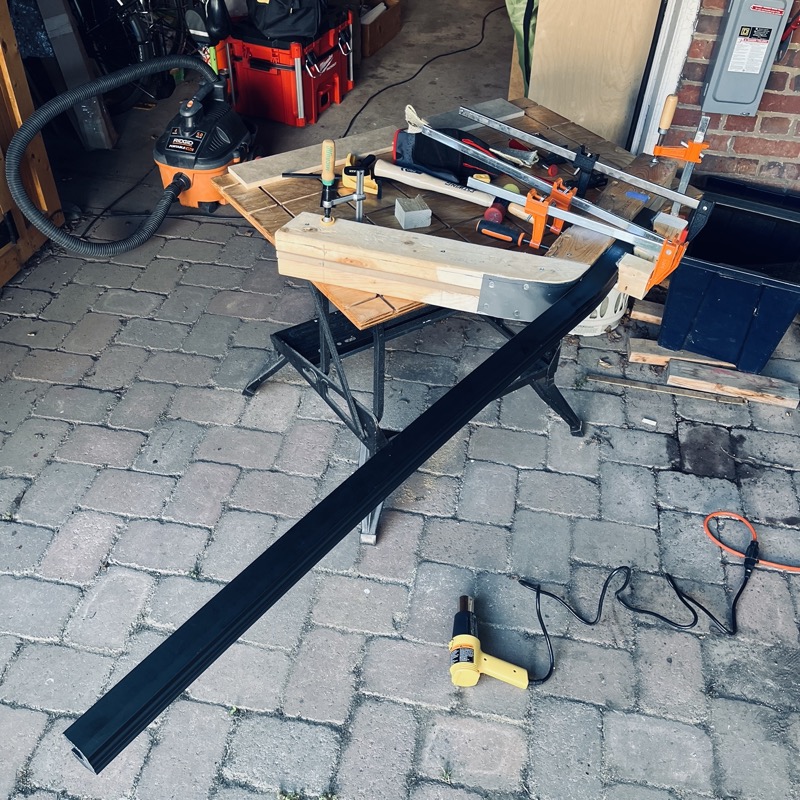
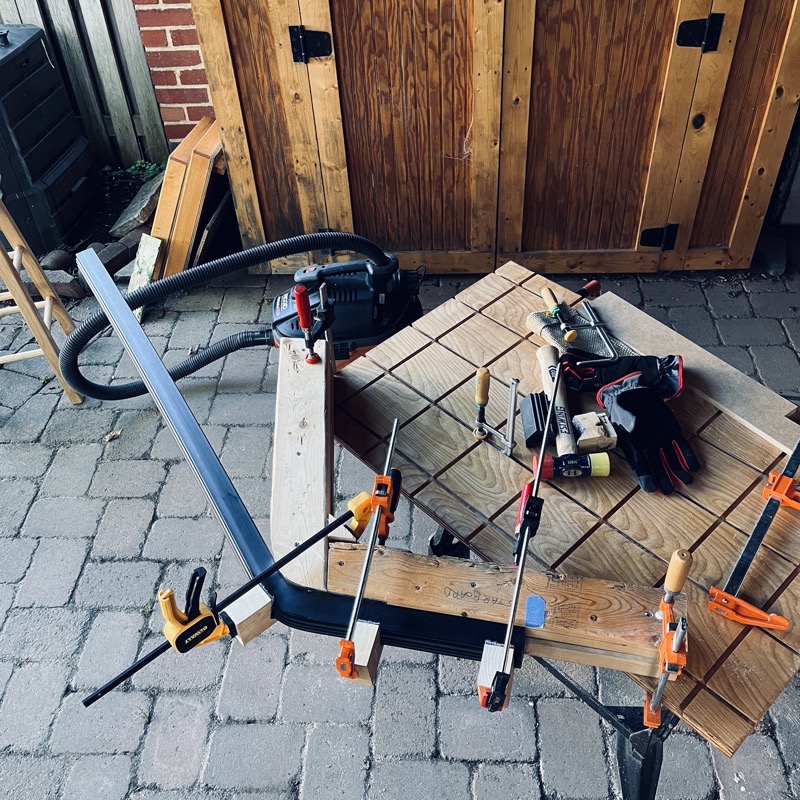
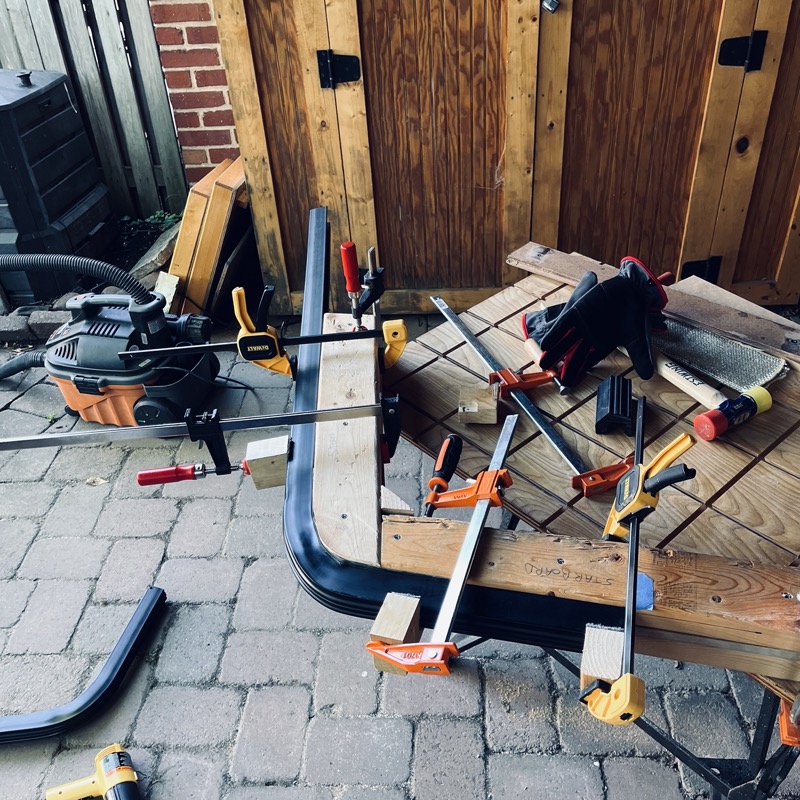
This all went fairly well. The one thing I would do different next time is to turn the form 90 degrees so that the bending happened vertically instead of horizontally, and gravity worked in my favor. That would make the clamping trickier, but it would make the bending easier and more accurate. When the form is horizontal as shown above, the heavy track is prone to sagging when bent in multiple steps.
Here is the final product installed on the boat. Unlike some other boats, the rub rail on the Mainships is secured through the top edge with screws that affix through a flange formed by the deck and hull, which I found much easier. I simply drilled the rub rails with a bit of counter sink so the screws would sit flush.
