
Houseboat Deck Replacement
By the end of the 2024 season I finished the latest of my major houseboat deck projects. Many houseboats from the 1970’s and 1980’s were constructed much like land-based houseboats, e.g., studs and deck joists on 16” centers, sheathed with plywood and covered with a weather-resistant laminate (formica was common back in the day) or fiberglass. Unfortunately, construction materials and techniques weren’t always marine grade, and when cracks or leaks develop they can cause significant damage and loss of structural integrity. What on the surface looks like a small area of damage can often be just the tip of the iceberg. The owner might not appreciate how significant the issue is until water starts pouring into the cabin or the galley.
These two projects are typical of the kinds of issues I’ve seen recently.
1980s Hilburn 54
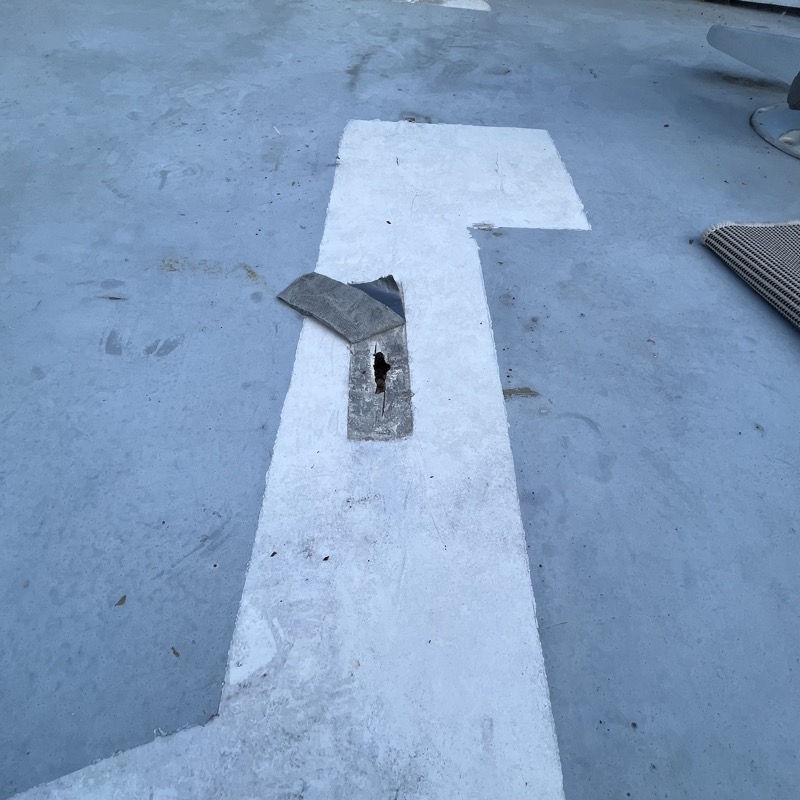
This project began with what presented as a 4-inch crack in the fiberglass exterior of the top deck of a 16’-wide houseboat. The owner had temporarily covered the crack with duct tape until a repair could be undertaken.
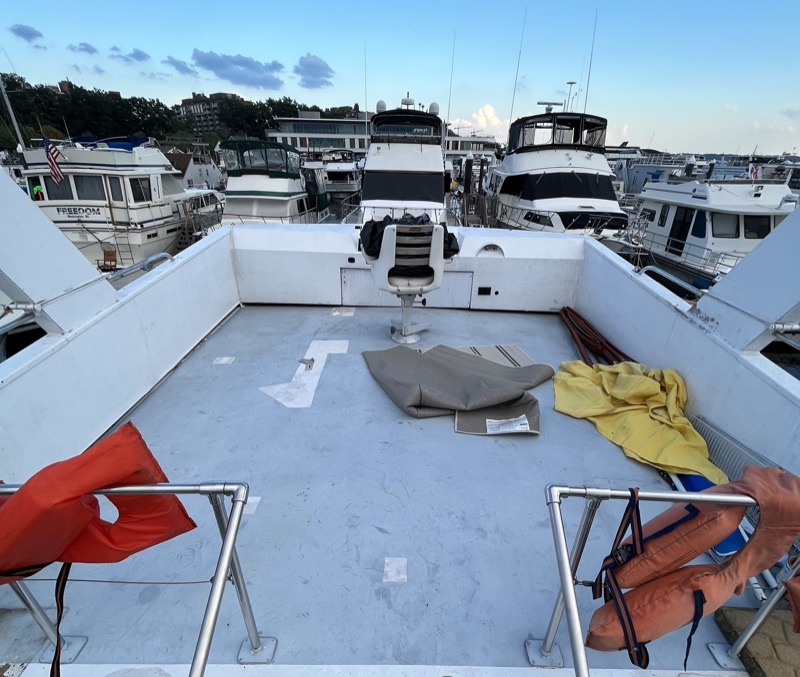
The top decks on Hilburn houseboats are constructed of 3/4” plywood atop joists running from port to starboard on 16” centers. The seams between plywood sections are not necessarily sealed or reinforced, and as a result they can move against each other, particularly if the decks are used for parties or other entertainment. This can cause the fiberglass to crack along the seams, letting water get in and cause rot to the plywood, the joists, and more. Improperly sealed fasteners screwed into the decking are another common point of water ingress. It doesn’t help that the original construction often used rust-prone steel staples or even conventional nails, sometimes galvanized, sometimes not.
By the time the owner notices something is wrong the damage can be extensive. And once you start exposing the damaged deck, there’s little choice but to keep going until you reach solid substrate. Until the fiberglass and decking is revealed, it’s difficult to forecast how large the repair area will eventually be.
In this first case the initial area looked to be about 14” wide and 40” long. This was estimated by “sounding” the deck, i.e. tapping it with the back of a screwdriver or ball peen hammer and listening for the desired sharp report or dreaded dull thud.
Cutting away the fiberglass over this area exposed plywood that was the consistency of wet cardboard, easily removed with just my hands.
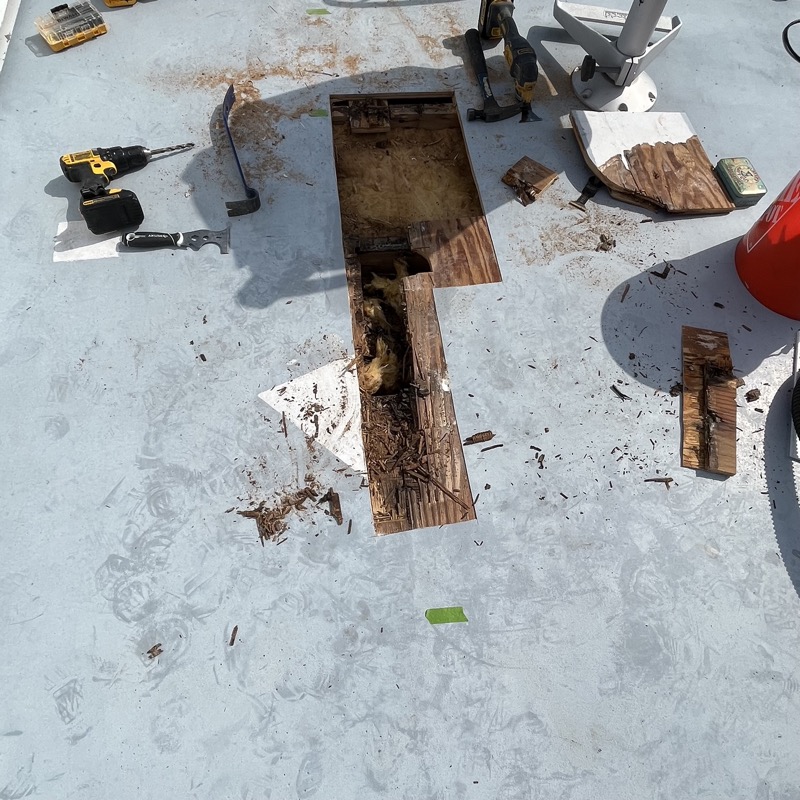
I continued to cut away fiberglass and plywood until the substrate was dry and solid, being sure—in the bow-stern direction—to end on the middle of a dry and solid joist so that the replacement decking would be well supported. Typically this means that the total repair area is at least 1-2 feet larger than the damaged area on each side.
In this case the total area to be replaced was just over 36” wide and 64” long. Beneath the plywood lay conventional fiberglass bat insulation which had soaked up a lot of water and had to be replaced.
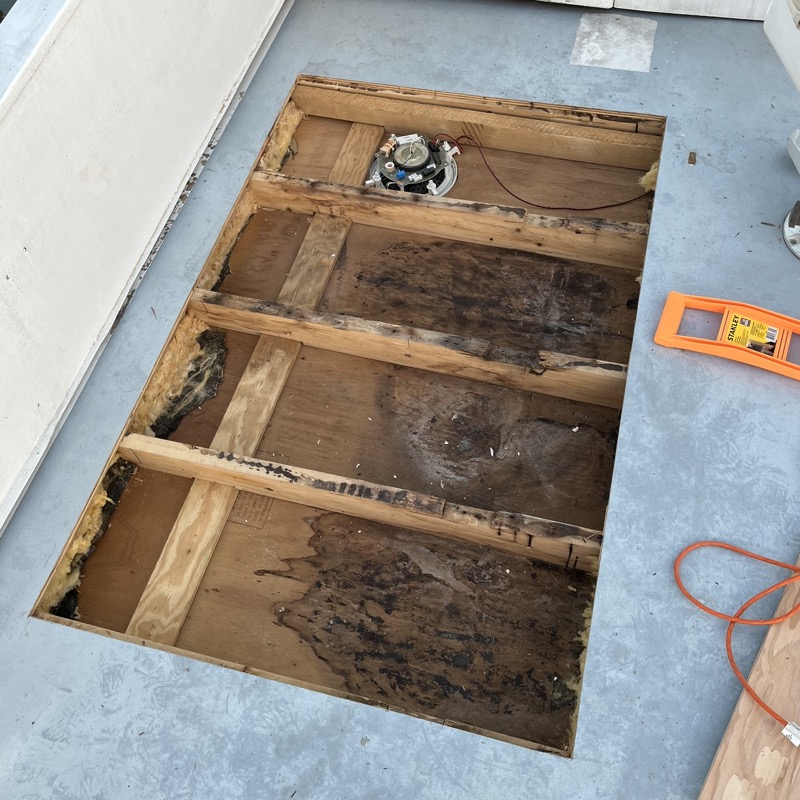
The next step was to address rot in the joist timbers. They were clearly not a marine-grade lumber: mostly likely construction-grade pine or similar. Thankfully the rot was not terribly deep. I ground out as much as I could and treated the rest with a penetrating epoxy. Then I cut lengths of marine-grade white oak to “sister” the joists where they might be weak. After replacing the insulation with rigid foam, I cut a piece of replacement decking (3/4” marine grade Douglas Fir), sealed the edges with a flexible epoxy, and fiberglassed over the new floor area. After some fairing, I applied primer followed by Interdeck non-skid paint.
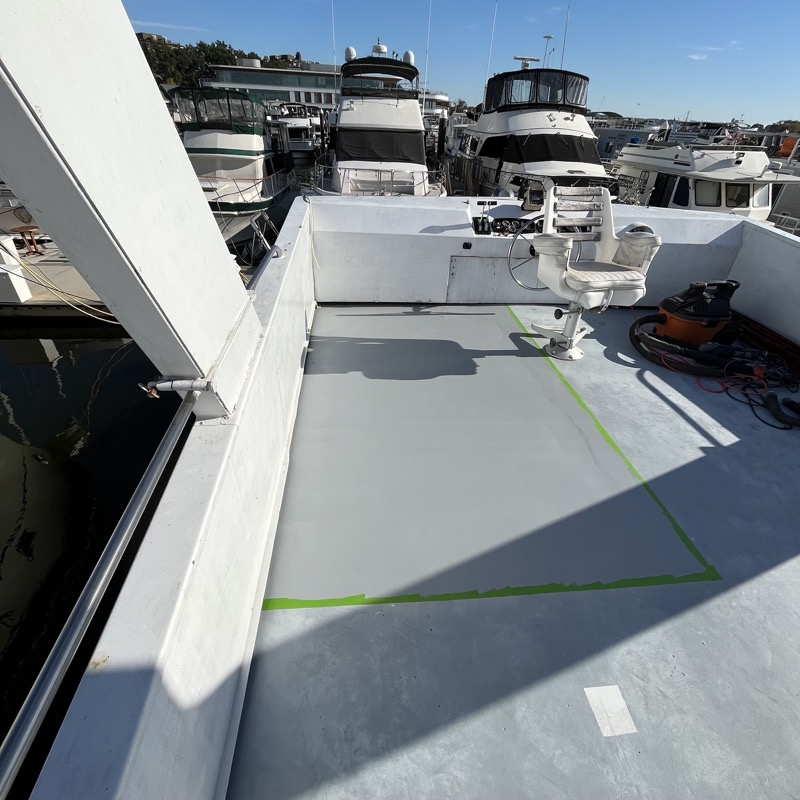
1987 Hilburn 50
The next season brought what looked to be a similar project, and I initially went about it the same way, exposing the apparent damage area towards the stern of the sky bridge and working outward from there. However, it wasn’t long before I realized the damage was much more extensive than I had hoped.
As mentioned previously, it’s often not until you dig into a project like this that you can fully identify what’s really underneath the surface. But once you start, you’ve pretty much committed to do whatever it reasonably takes to repair the damage. Early on I could already see the damage was extensive, including not only rotted joists and decking but the outer port-side frame of the top deck. I could also see that a previous owner had attempted a limited repair at an earlier point. What I didn’t know is how much more rot lay beneath the deck area that I hadn’t removed yet, particularly along that outer frame. Going further would mean not only removing and replacing additional plywood deck, but the 12” overhang on the port side, which would expand the project scope substantially.
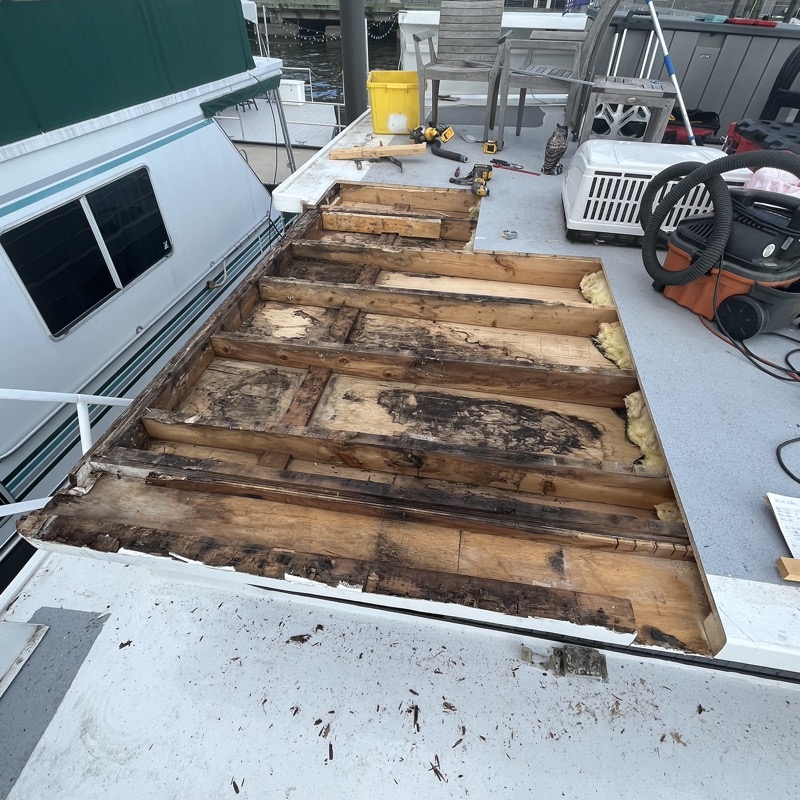
So I stopped at this point and gave the client some options. Under a limited option, I could stop demolition at this point, replace or reinforce the rotted beams, joists and plywood for something close to my original estimate. The new deck would be weatherproof, but not structurally sound, and I would not recommend using it for entertaining. The second option was to keep going with the goal of addressing all the structural issues, hoping for the best but prepared for a much larger and more expensive repair. We had already ruled out a complete deck replacement as unfeasible given the limits of working outside and in the slip. The client chose to go for the second option.
The outer frame on the port side turned out to be rotted for almost 16 feet. In the picture below, the two owls mark the “initial” area that soundings identified as “soft”.
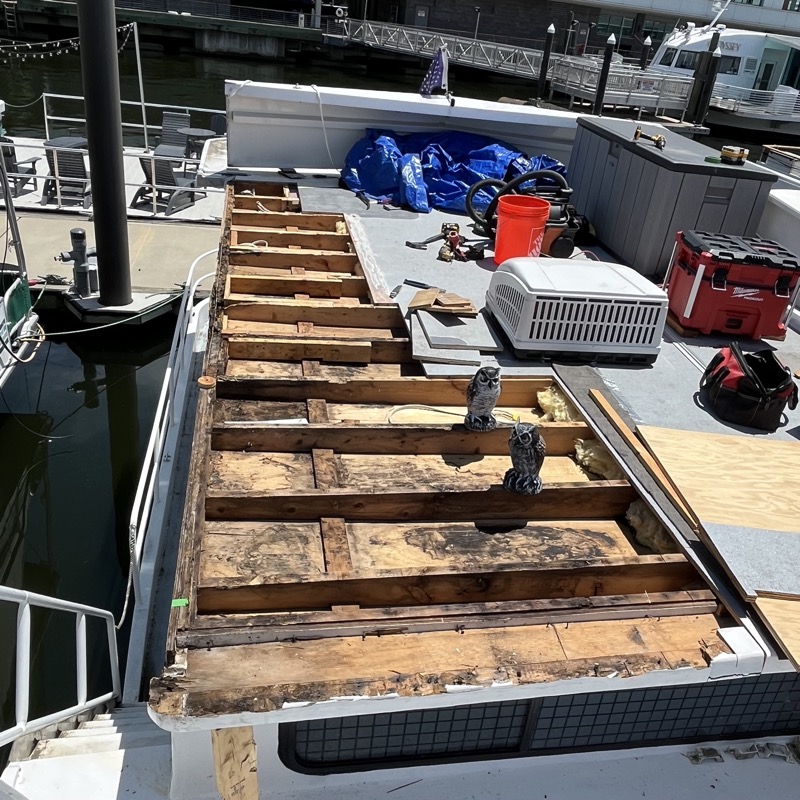
Furthermore, water had penetrated the end grain of the plywood sheath that comprised the port exterior wall. This could not be replaced without disassembling the entire side of the boat, so I’d need to think of something else.
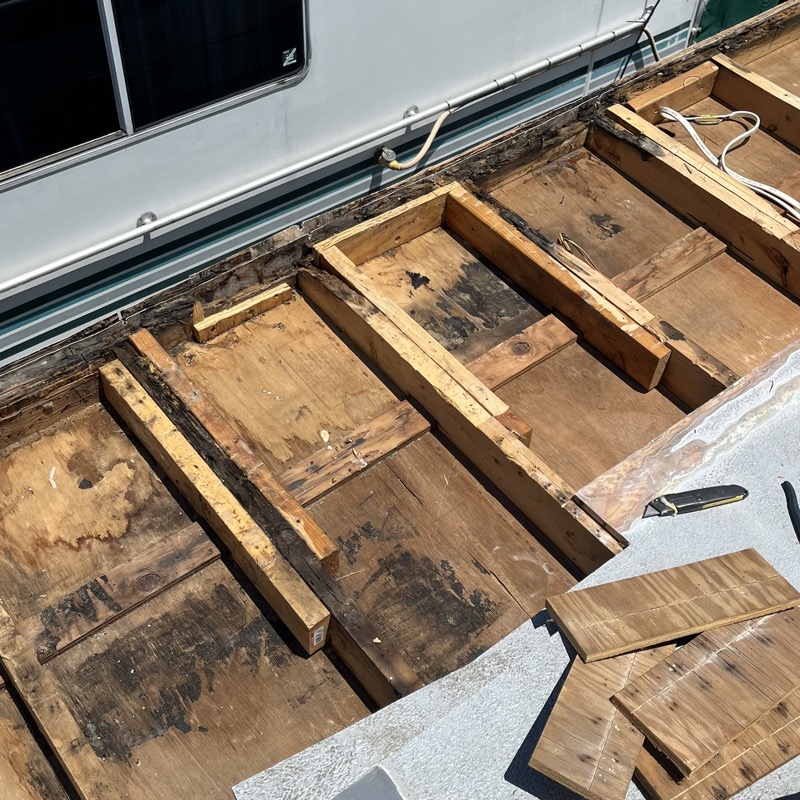
But first I needed to add jack stands throughout the length of the houseboat cabin, since there was little to no roof support on the port side. 10 or so 2x4” studs cut to length with protective carpet fragments did the trick.
With better supports in place I proceeded to treat the rotted areas of the horizontal joists. I ground out as much as I could with a belt sander, soaked the remaining areas with antifreeze, and filled some of the weakest areas with a penetrating epoxy. Then I “sistered” the compromised joists with fresh Doug Fir 2x4” and 2x6” lengths.
With the floor joists still in place, I set about removing the rotted timber on the port side. I replaced it with the longest 2x4” Doug Fir lengths I could find, and reattached the joists using stainless steel joist hangers.
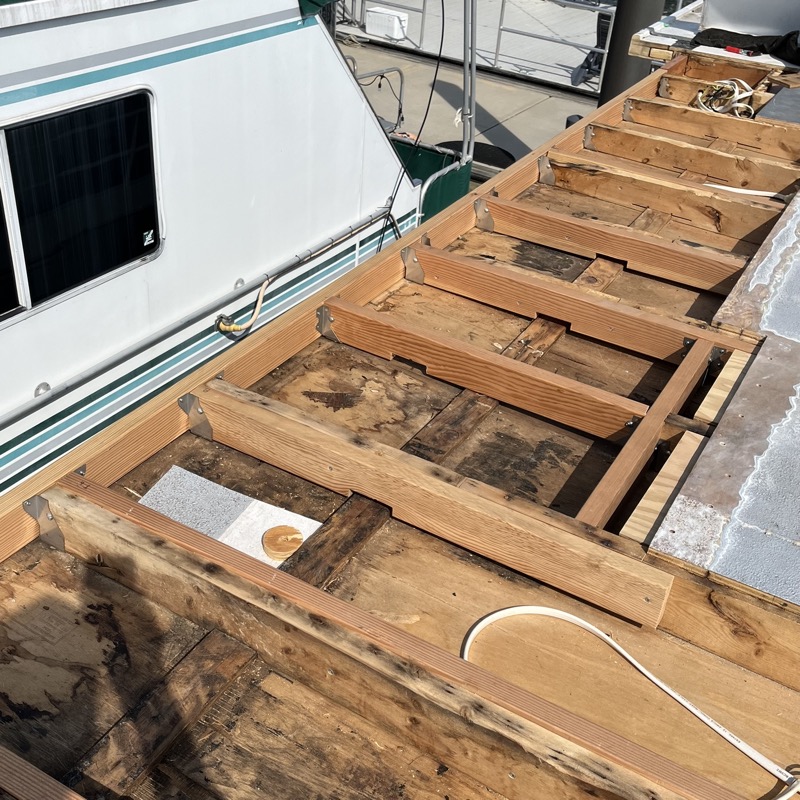
Once the deck was structurally sound I turned to the rotted sections of the port wall. The original material here was 3/4” plywood with some sort of exterior laminate on both sides, possibly formica. I’m guessing the plywood was not marine grade given the extent of rot, but the laminate layers were still in decent shape. Since replacing the entire wall was not an option, I scraped out was much of the rotted plywood as I could, and cut a set of replacement plywood fragments to fill the empty spaces. Then I filled the gap with thickened epoxy, coated the fragments with more epoxy, dropped them in place, and clamped the whole wall tight. It was sort of like building a sandwich from the outside in. Like a pita sandwich perhaps.
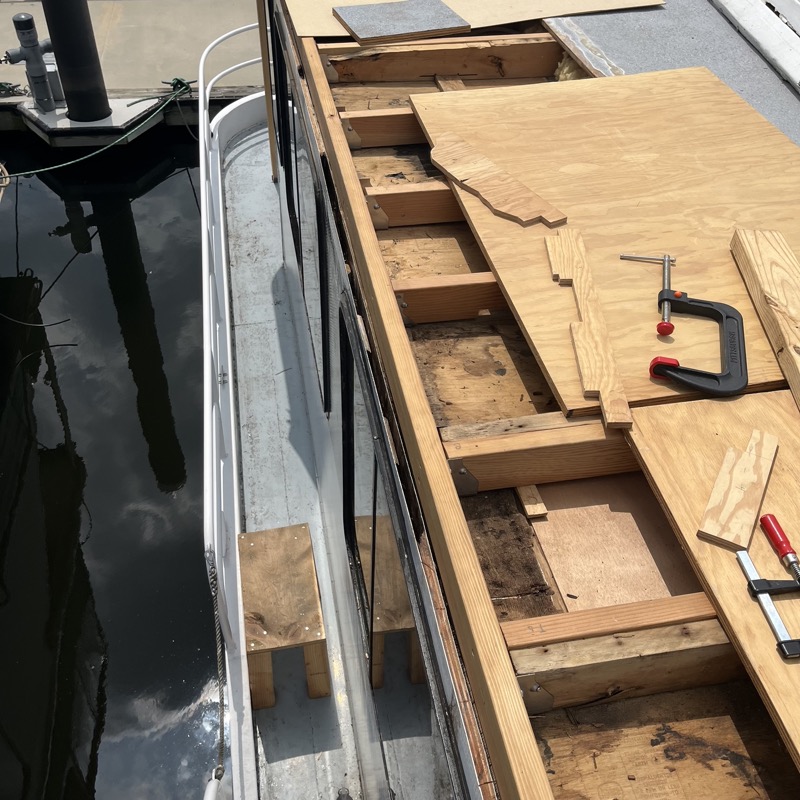
Here’s what the wall looked like after the epoxy cured. Afterwards, I added 1x4” lengths of Doug Fir so that the deck frame would be level with the wall.
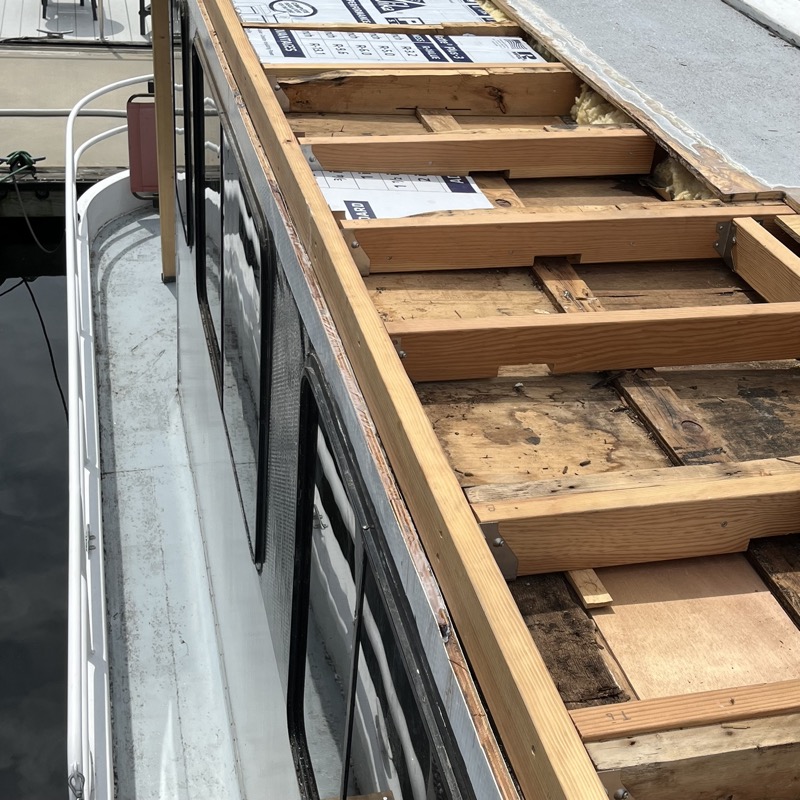
With the home stretch finally in sight, the next step was to reinsulate the roof—this time with rigid foam insulation—cut and install marine-grade plywood decking, and lay up 2 layers of 20oz fiberglass.
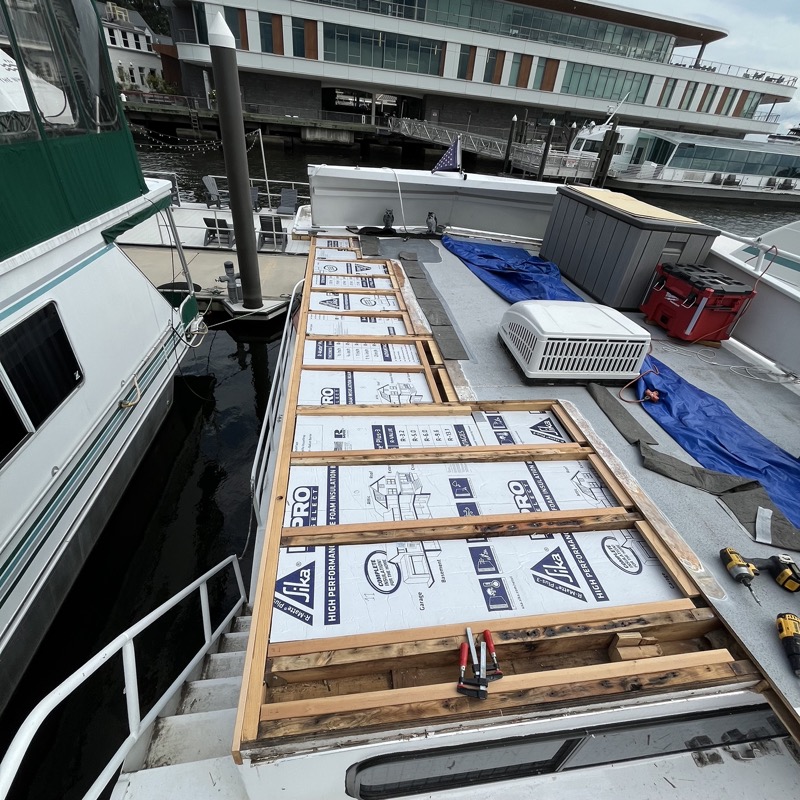
The fiberglass part was a bit tricky because the summer of 2024 was especially hot, and the area to be glassed was over 80 square feet. No matter how early I started and using slow cure epoxy, the deck was already getting too hot by 10:30am. I ended up doing the lay up in three sections over three days. To avoid seams, I offset the top layer of cloth by about 2” so that the next day’s lay up could dovetail with the current one without creating noticeable seams. It worked sort of like a lap joint would.
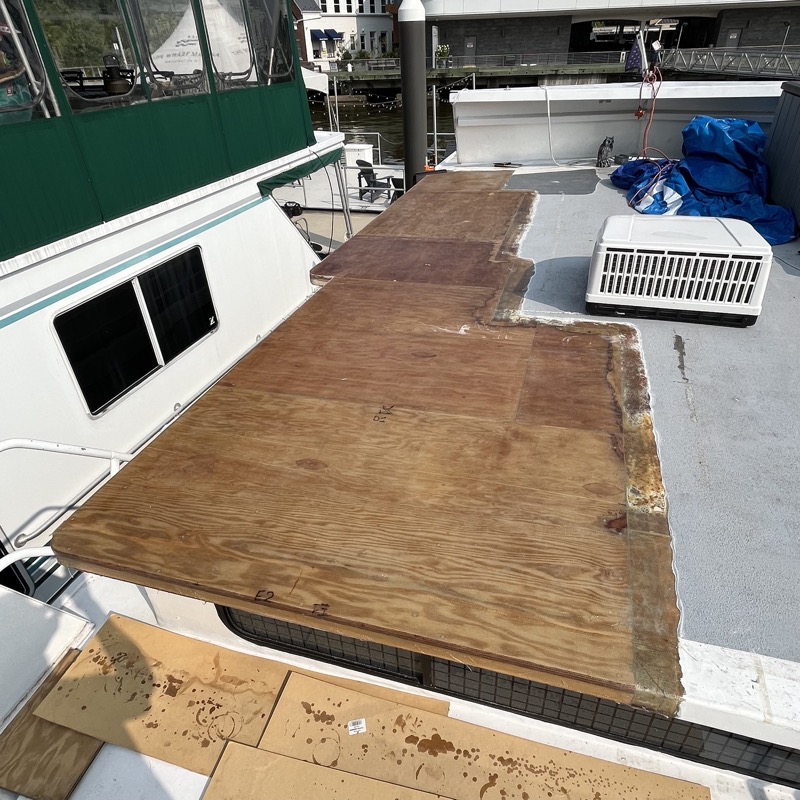
The final structural detail was to add the 3/4” lip around the edge of the new deck. Unlike the original, I cut several drains into the lip so that water would drain off the top deck instead of puddling where it might cause future issues.
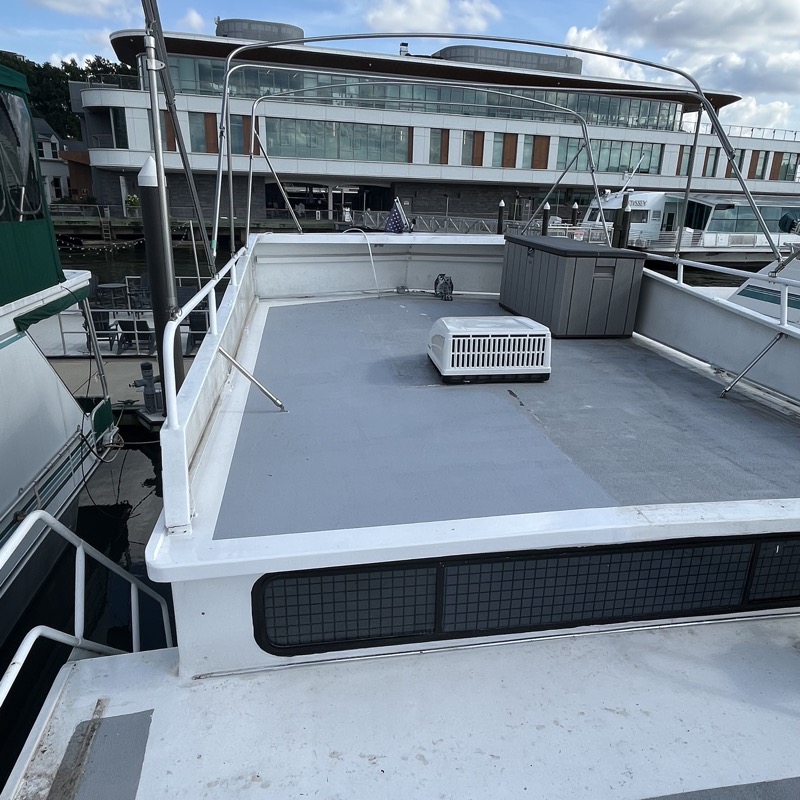
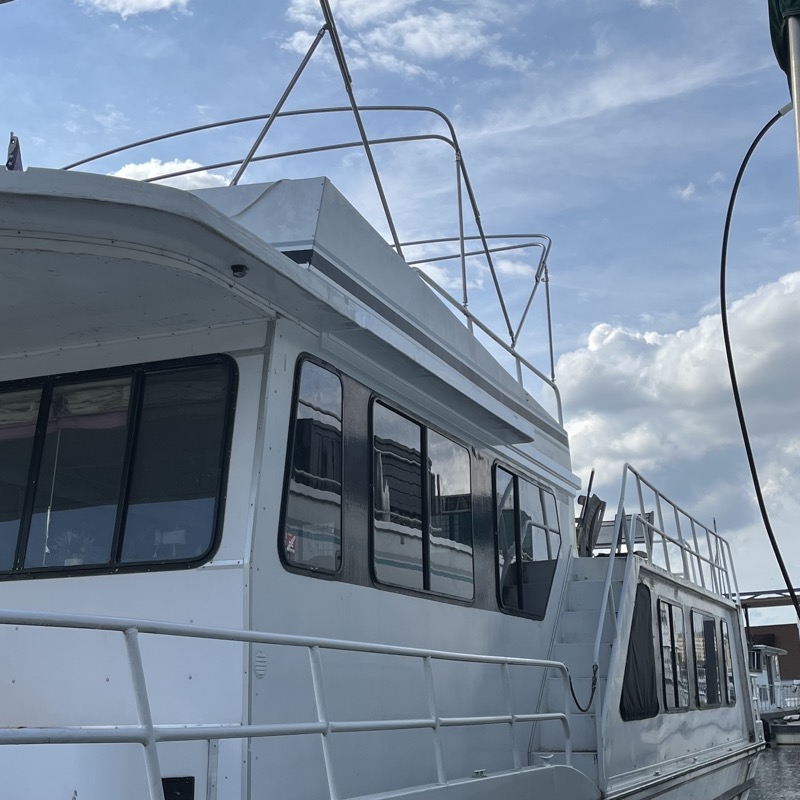
Here is the finished project after topside and non-skid paint, and reinstalling the deck walls and bimini frame.
Here is a quick video timeline of the project with more pictures: