Mold Construction and Layup
I tried as much as possible to replicate the look and dimensions of the previous hatch cover. The only difference I made was that the previous hatch was pretty much flat on top, while I wanted a slight arc from port to starboard so that water wouldn’t pool on top of it. Also, the hardware fasteners on the previous hatch were drilled in from the outside which I thought was unnecessary, and I instead opted for mounting blocks glassed to the inside.
Here are the mold dimensions, with everything cut from 1/2” plywood from the big box store:
- Base (hatch top): 21.5” square on the outside of the mold, with a 3.5-degree bevel cut on the back side (where the hinges attach) and an 8-degree bevel cut on the other three sides. Thus the dimensions of the top side of the base (inside of the mold) are slightly greater than 21.5” due to the bevel.
- Sides: 4 3/16” height with widths slightly longer than the side of the base. I cut each side on one end at an angle to match the bevel in the base.
- Arc (for both the top and the cutouts from the front and rear sides): 21.5” wide (i.e. the chord) by 7/8” height, which equates to a radius of approximately 66.5”. Using these dimensions I cut an arc from the left and right sides and a set of shims to provide a curved top.
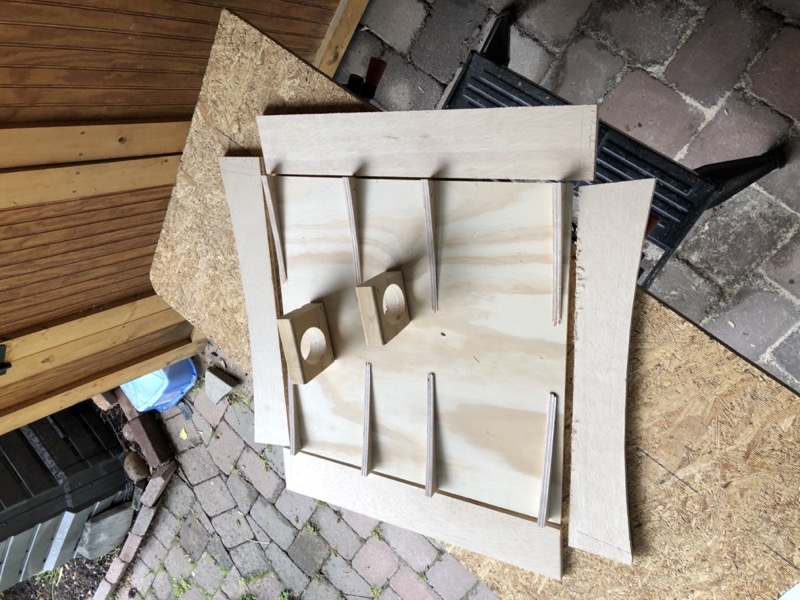
I also cut some jigs from scrap 2x4 that would help me nail the sides to the top. Each jig piece had an angle cut to match one of the bevel cuts in the base piece. Here is an exploded view.
Clamping the jigs to each of the sides made them sit perfectly against the bevel in the base piece just long enough to nail them in with a brad nailer. The oversized widths on each side formed perfec corners automatically (obviously sloppy for furniture or finished products, but fine for a mold).
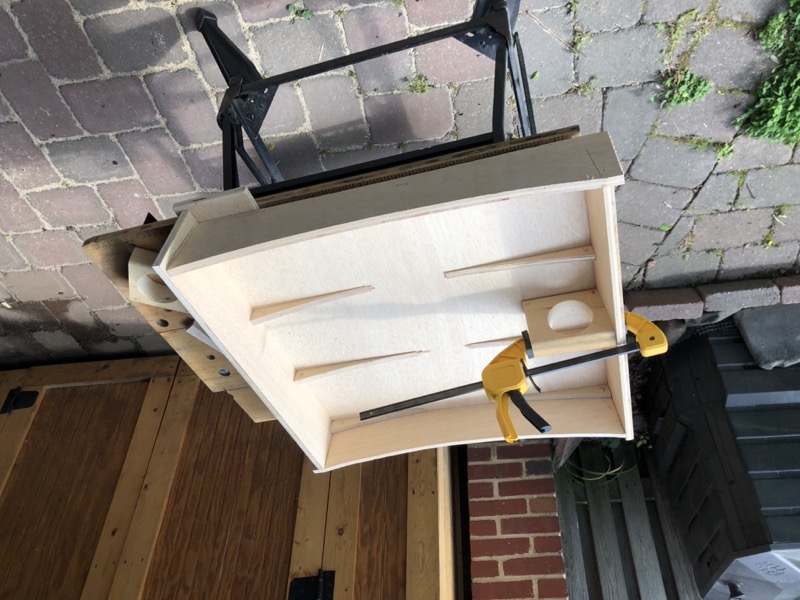
Next, I glued the curved shims to the base to provide the arc for the top of the cover, and brad nailed a piece of 1/8” MDF to form the top (the shortest brad nails I could find were 5/8”). Then I used Total Fair to fill the edges (there are cheaper alternatives but Total Fair is what I know best) and a 1” popsicle stick to provide a consistent curve. After sanding down the rough spots from the fairing compound I sealed the entire surface with two coats of epoxy, sanded it smooth, and applied 3-4 coats of carnauba wax.
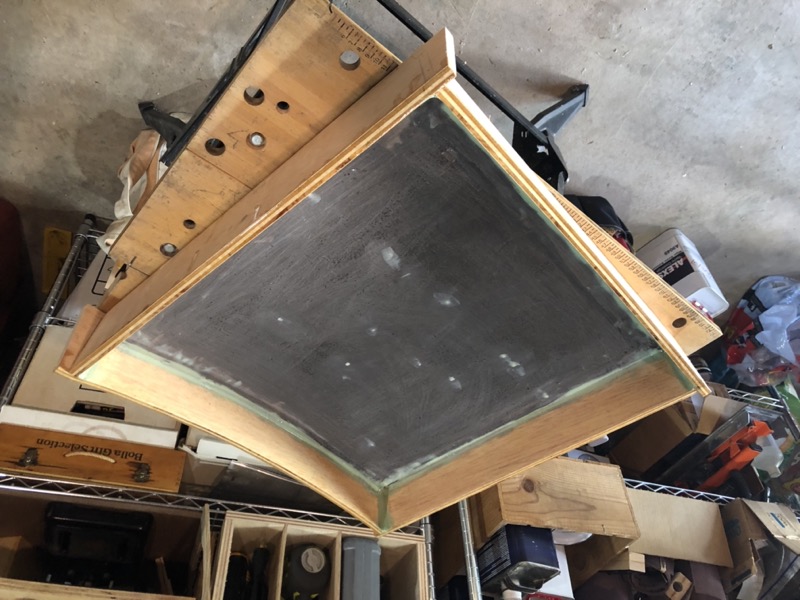
Layup
Although 1708 fiberglass cloth may have been preferable (and obviously thicker), I went with #10 cloth because it’s what I had on hand. Before layup I precut all my sections, 5 square pieces for the top and 6 rectangular pieces for each of the sides. Each piece was slightly oversized so there would be some overlap. I also cut a square piece of 1/4” balsa core to make the top side stronger.
After applying mold release to the entired mold (I used Mann Ease Release 200 but I’m sure any similar product would suffice) I mixed up some thickened epoxy, applied it to the top with a chip brush, and added the first top piece. Then I did the same with each of the four sides, overlapping the cloth pieces at the corners, and rolling out the air bubbles with a fin roller. Then I just repeated the process 3 times over but using unthickened (neat) epoxy. After four layers I saturated the balsa core piece and applied it to the top, then added two more layers of cloth to the sides and one more to the top. I tried to mix up my epoxy in fairly small batches so it wouldn’t kick off too soon, so I alternated between layup and mixing.
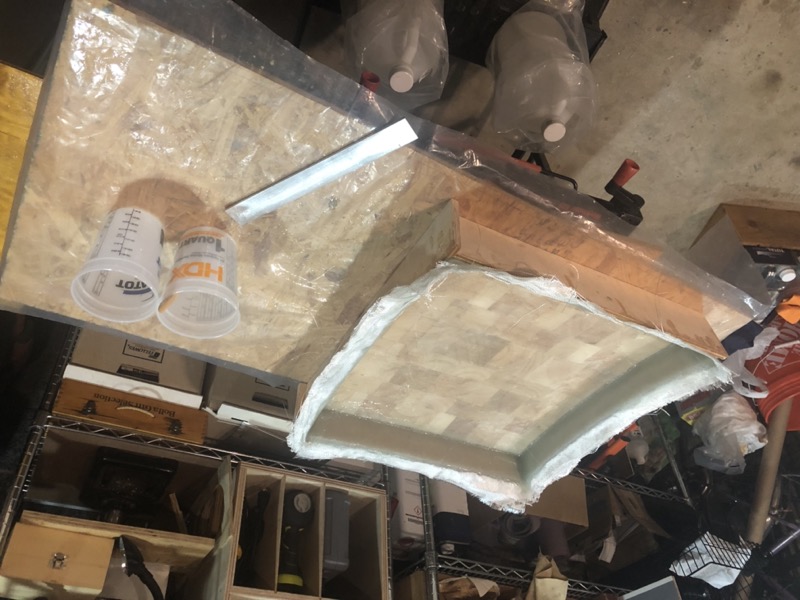
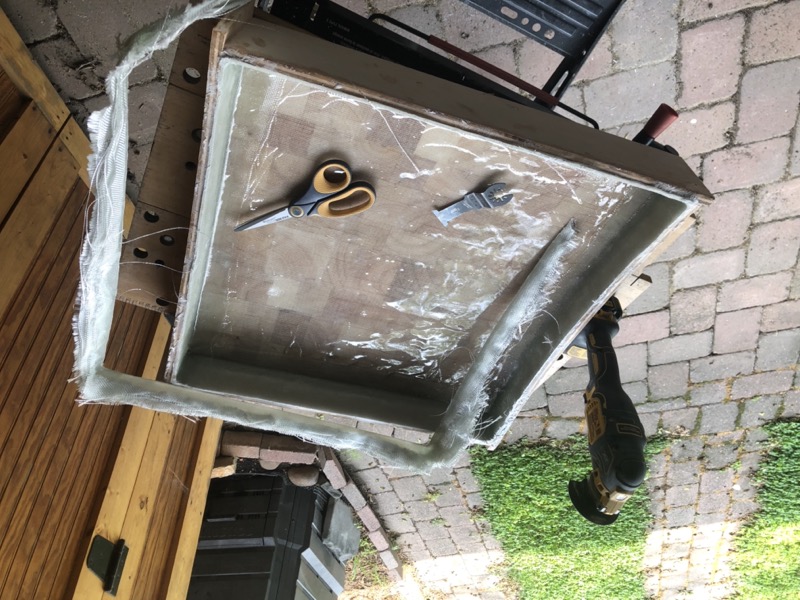
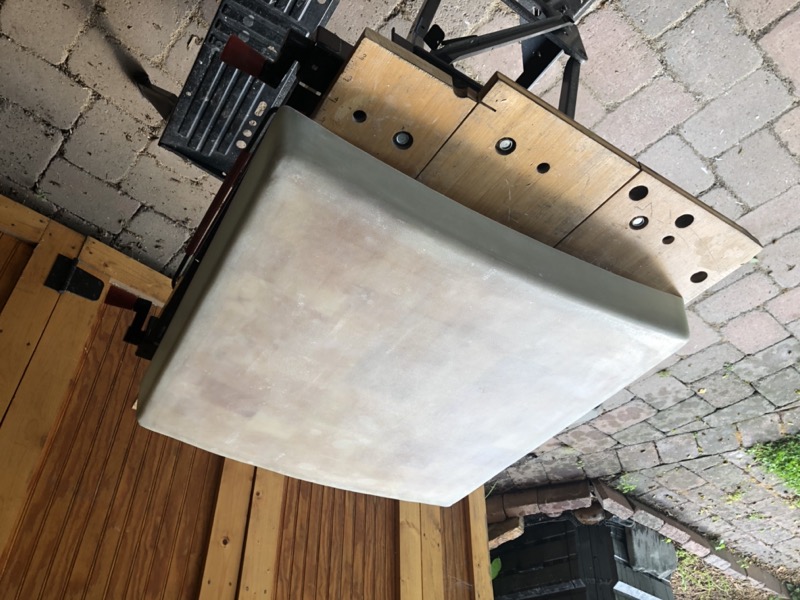
By the next morning, the hatch had cured completely, leaving residual fiberglass cloth fragments hanging over the outside of the mold. Time to pop the piece out of the mold! At first this was a bit difficult, not because the piece was stuck but because the fiberglass and the mold form a pretty tight vacuum. But once the vacuum had been broken the piece came out easily. Mold release works!
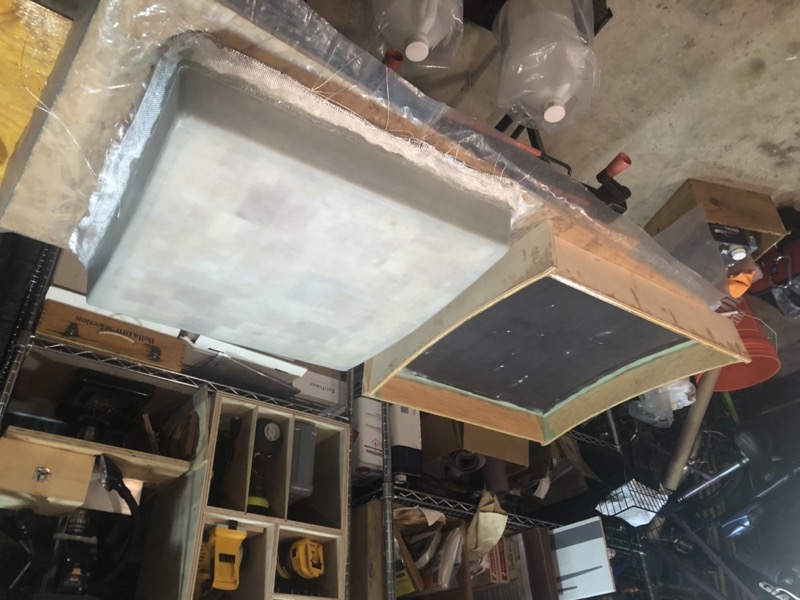
The mold also served as a cutting guide for removing the frayed edges. I just dropped the piece back in the mold and cut along its edges with an oscillating multitool (a tile cutter plade works great).
