
Final Coaming Repairs and Refinishing
It would be over a year before I finally returned to the coamings, which were patiently hanging out in storage back in my workshop. Most of the major repairs had been done (or so I thought) and by that time I had already sanded off the old varnish on both the port and starboard pieces. I had also stripped, sanded, sealed (with epoxy) and varnished the stern coaming piece, which was in relatively good shape and required only minor repairs.
The remaining tasks were:
- Fix and reinforce a split in the starboard coaming
- Reattach the shoulder on the port coaming
- Plane the bottom of both coamings to create more space between the seats
- Seal and varnish
Starboard Coaming
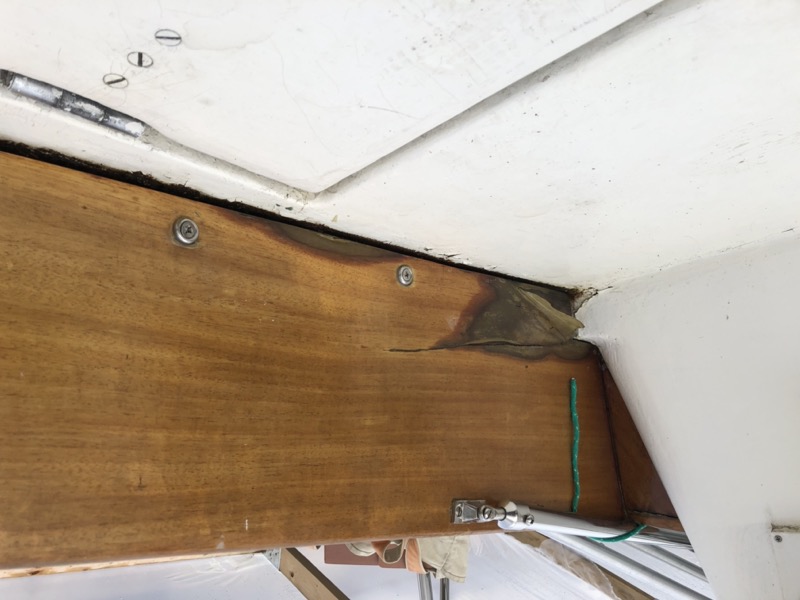
Years ago, the last time the coamings were removed for refininishing, the starboard coaming split under pressure during the re-installation. The crack occurred along the bottom portion near the cockpit seat, where the shape of the cockpit pushed the coaming inward on the low side without similar pressure on the high side, causing the wood to shear. Unfortunately, this was also the area where water tended to puddle on the cockpit seat, and the split wood was badly rotted as a result.
Here is a picture from the beginning of the project:
The wood in that corner was badly rotted on the inside, too far gone to fix with epoxy. I had no choice but to grind away the wood that was beyond saving. While the remaining wood was substantially thinner, it also would provide a bit more room so that the board wouldn’t have to bend as much to conform to the curve of the cockpit seat. Hopefully that would make for an easier re-installation.
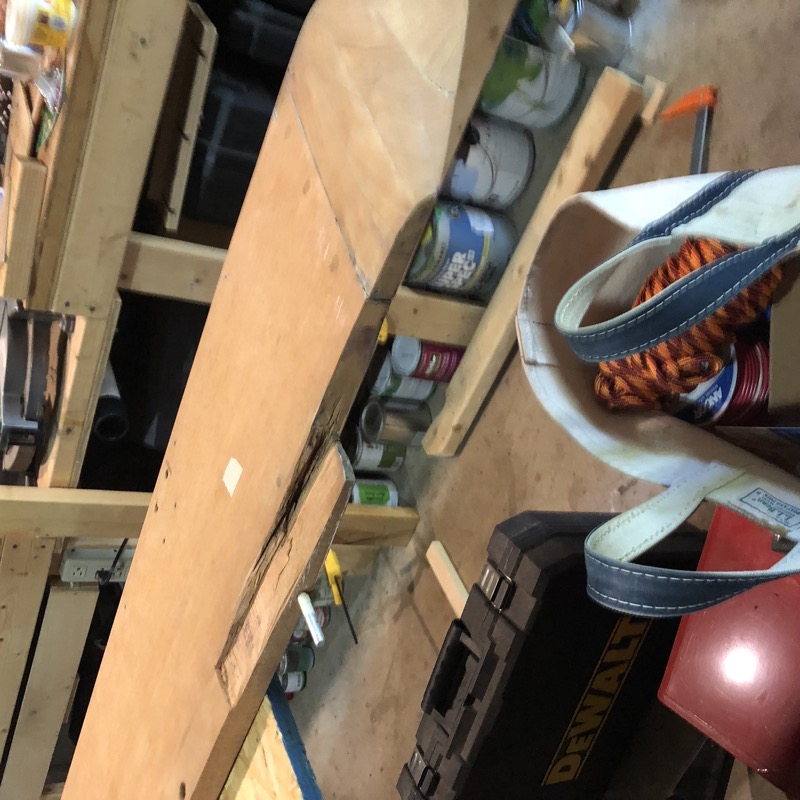
Even still, the large split would need to be reinforced. I didn’t think epoxy alone would do it. So I drilled two 1/4” holes through the width of the board, about 4” deep, and pounded in a pair of aluminum reinforcing pins.
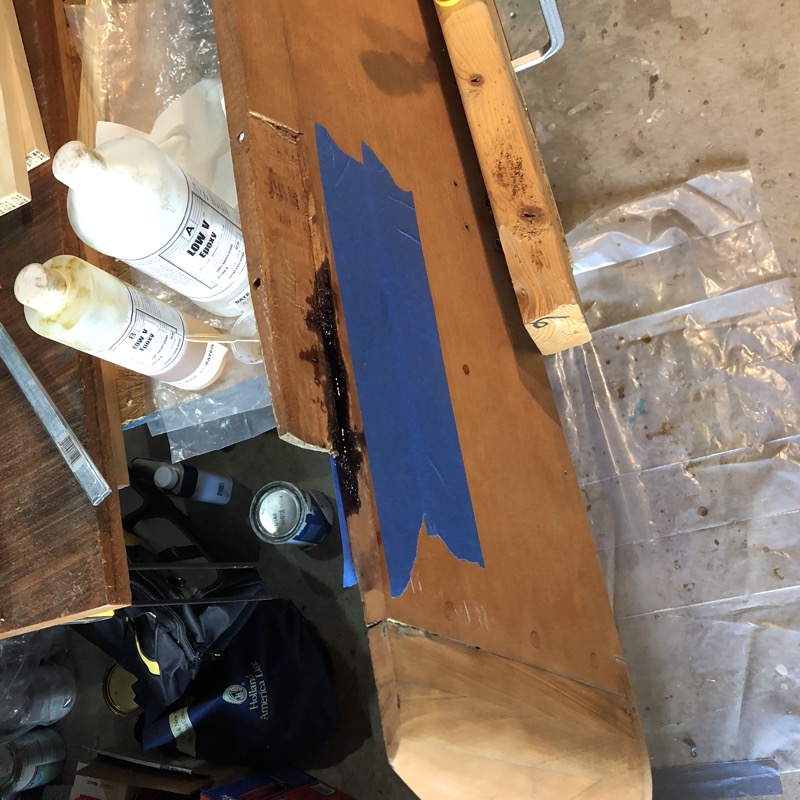
Finally, I filled the remaining “soft” areas and the large crack on the exposed side with a penetrating epoxy to reinforce the wood.
Reattaching the Port-side Shoulder
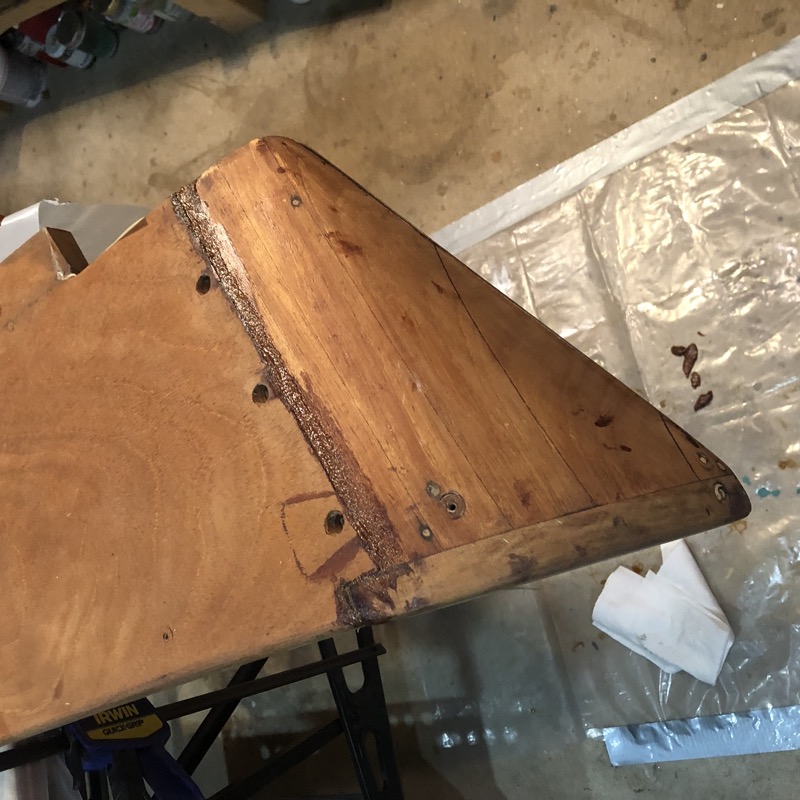
Re-attaching the shoulder would be easy enough (screws and epoxy) but getting the angle correct to mate with the side of the cabin was giving me fits. Although I traced the original angle while still on the boat, an error of even a couple of degrees or less would be problematic. I really had no choice but to go for it and hope for the best.
After toying around with a few ideas for jigs, I ended up simply screwing the shoulder into place as originally fastened, and applying thickened epoxy to both the inside and outside of the seam. The fasteners held the shoulder in place as close to my template as I could discern. Afterwards I covered up the fastener holes with fresh bungs.
Planing the bottom edges
As I said in my introduction, one of my goals was to fix the gap between the bottom of the coamings and the cockpit seats. The current spacing was inconsistent: it ranged from almost nothing to perhaps 1/2”. It trapped water and all sorts of gunk, was difficult to clean, and over time was damaging the bottom edge of the wood.
Originally, I had planned to fill the gap completely with some sort of dutchman. But after thinking about it and talking it over with some other Seabreeze owners, I decided this was too difficult and probably wouldn’t look very good. The alternative was to go the other way, and expand the gap enough to get a sponge beneath and keep it clean. That, together with fresh sealant and my plan to seal the wood with a penetrating epoxy, would hopefully keep the wood in good shape.
As explained earlier, I already had a template of the current spacing of each coaming relative to the cockpit seat, which I had transfered to PVC strip. That allowed me to consistently “level out” the bottom edge of each coaming to just short of 1/2” from the seat; just enough space to clean underneath, without coming too close to the fasteners along the bottom edges. The extra space would still allow some water to puddle on the seat without coming in contact with the wood. I marked a line on the bottom of each coaming and simply planed off what fell below the line.
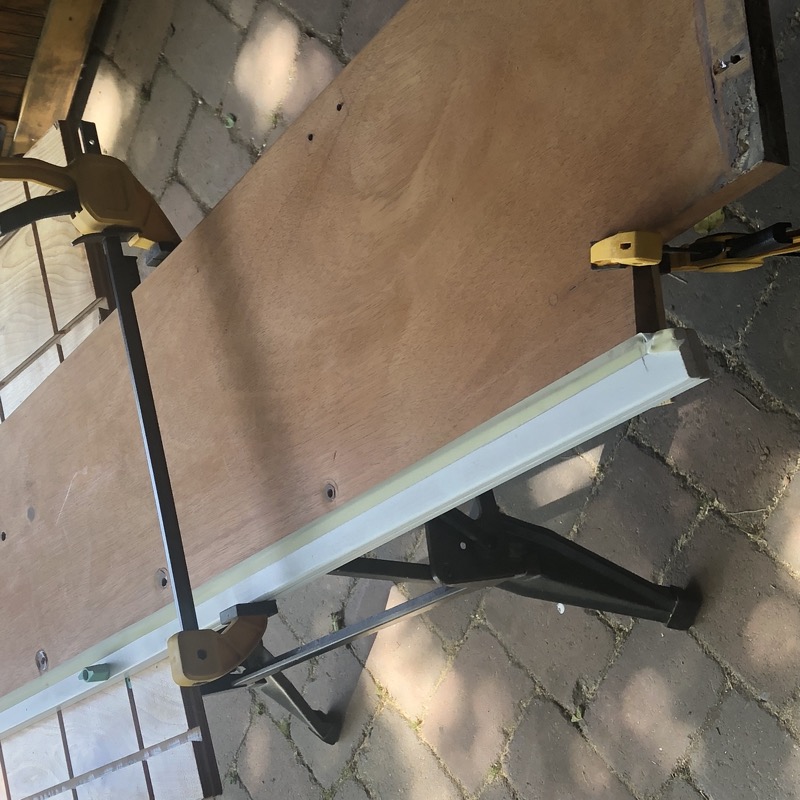
(side note: DeWalt’s cordless planer is amazing!)
Epoxy Seal & Varnish
My plan for finishing the coamings was to first apply two coats of a penetrating epoxy to fully seal the wood before proceeding with the usual 10+ coats of varnish. My goal was basically to make the coamings impervious to water and avoid future rot issues completely. Having already finished the winch blocks this way, I felt fairly confident things would go smoothly. Boy was I wrong!
Two coats of epoxy resulted in the worst fish-eye effect I think I’ve ever seen. The picture below shows the one coaming with two fresh epoxy coats and the other after some fairly aggressive sanding. Since I hadn’t seen anything like this for the winch blocks—or on any prior project using virgin mahogany—I figured I must simply have done a poor job with surface prep.
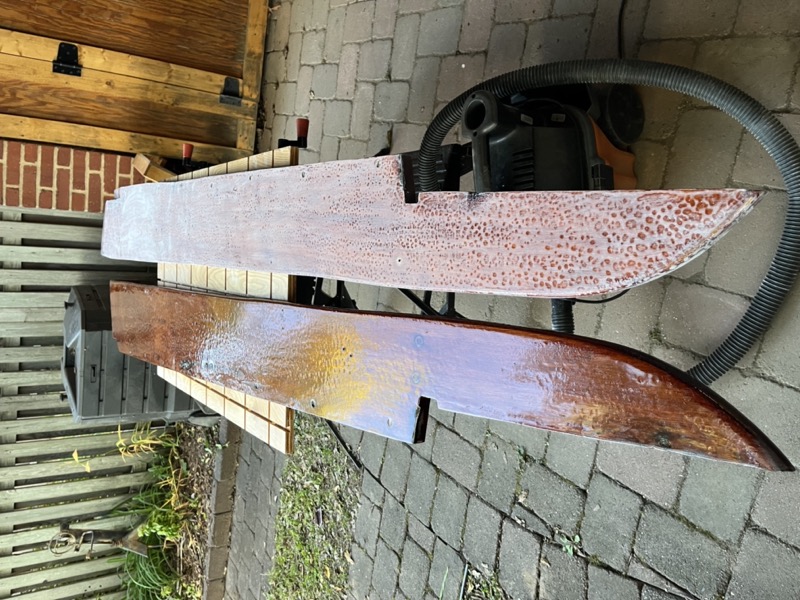
So I started over and sanded off the epoxy back to bare wood. This time I made darn sure my mix cups and brushes were clean, and I wiped down the surface four times with acetone. And the same thing happened again!
At this point the only thing I could figure was there was some residual treatment deep in the wood grain applied by a previous owner. I still don’t know what it was and I’d sure like to know. But I figured that starting over a third time would just waste more epoxy.
Instead, I started varnishing, sanding with 320-400 grit sandpaper in between coats just like normal. I built up about 8 coats of varnish. The fish eye effect didn’t abate much, but I now had enough varnish coats that I could try to sand it smooth without burning back through the epoxy. That worked reasonably well; here is a picture of an unvarnished, partially sanded coaming on the right, and a heavily varnished and sanded one on the left.
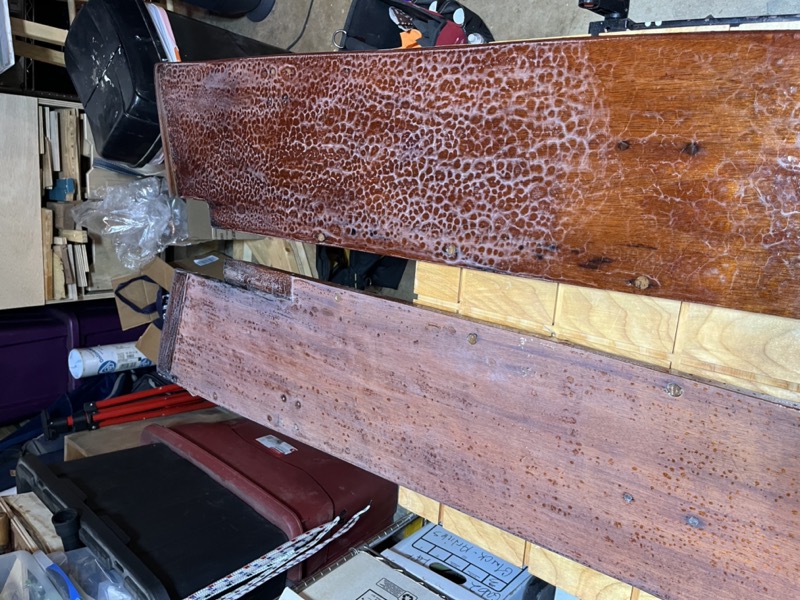
When sanding, it’s tempting to want to sand the “fish eye” part of the finish since that’s what you want to eliminate. However, the circles are the low points in the finish so you actually want to apply more sanding to everything but the fish eyes ;)
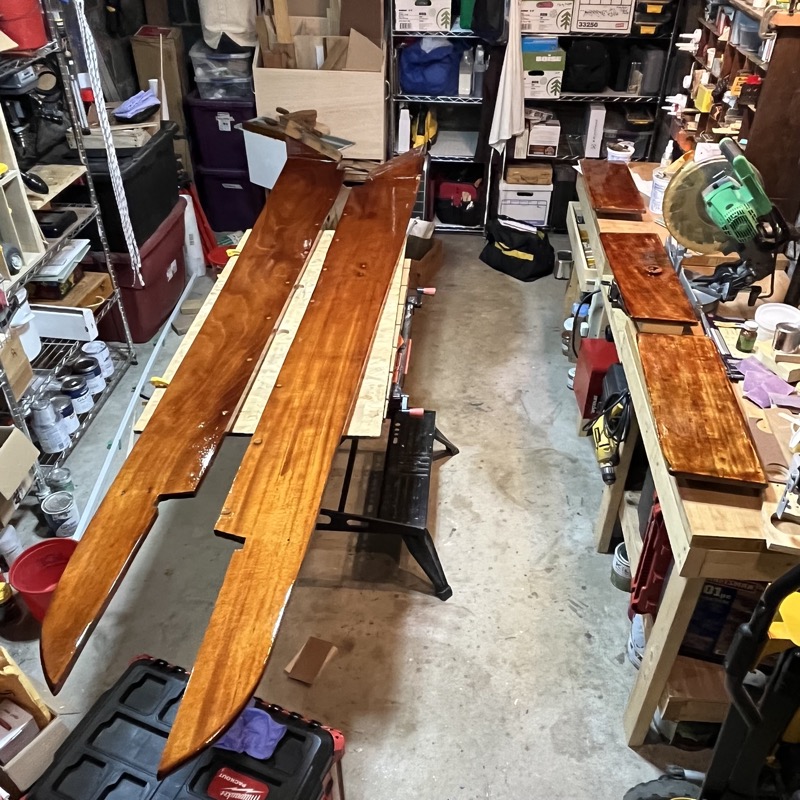
Once I’d gotten most (but not all) of the fish eye effect sanded out, I started over and applied 8-9 coats of varnish. As you can see in the next picture, there’s still some fish eye under the glare of my shop lighting, but by the light of day it’s not noticable at all.
At some point I usually lose track of how many coats I’ve applied, so for a job like this I keep varnishing until I lose track, do 3-4 more coats, and then quit. For exterior applications, varnish is an ongoing commitment and maintenance coats are a must. So there’s no such thing as a final coat ;)