Boot and Cove Stripes
The stripes presented a bunch of new technical challenges that I had never faced before: marking consistent width stripes, masking, brush techniques, the ornamental arrow and fins on the cove stripe, and whether it was better to just go with vinyl striping instead.
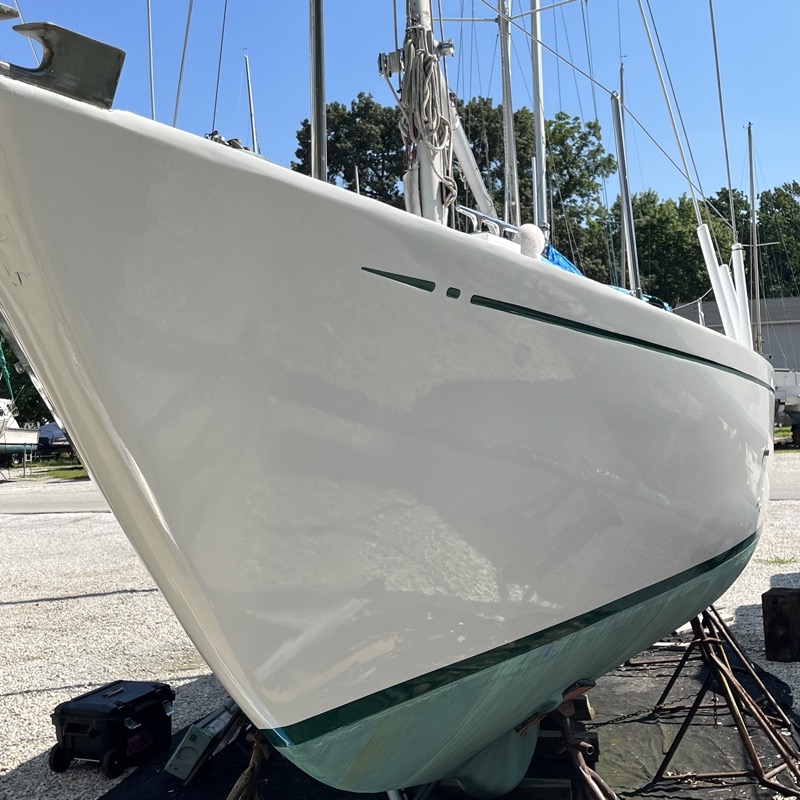
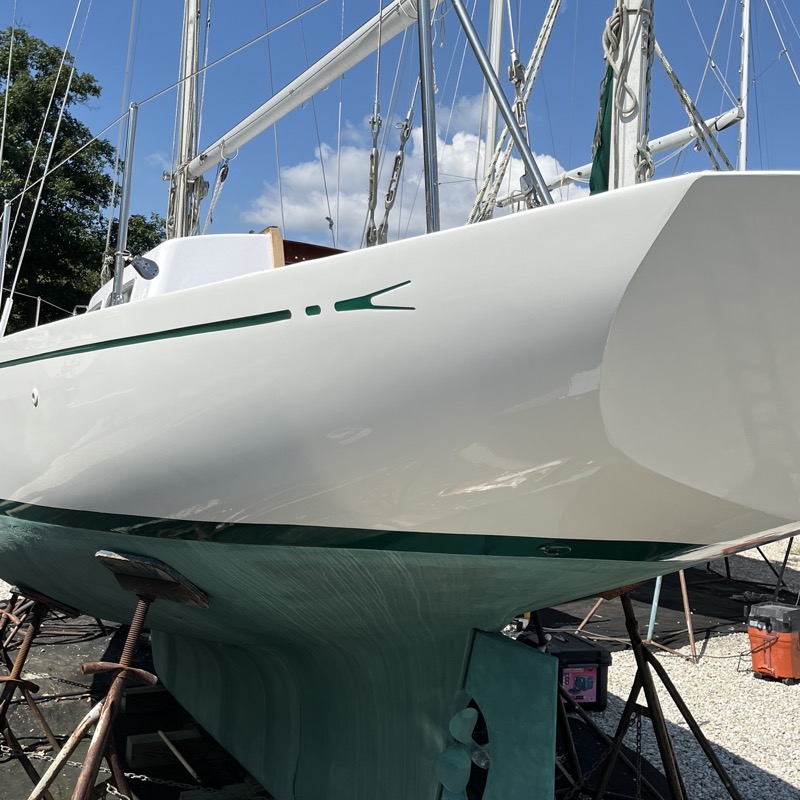
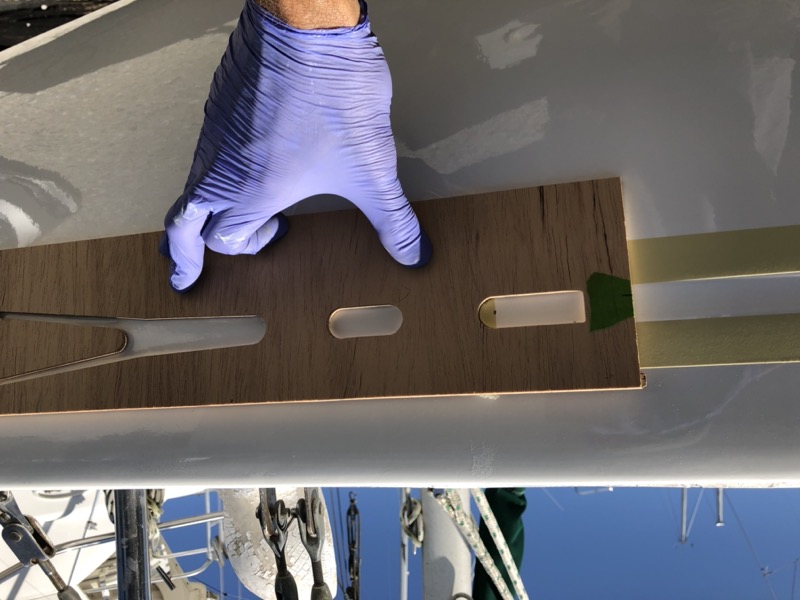
Before doing anything on the hull, I spent a lot of time testing different options on the test board mentioned previously, which I primed, painted and sanded back at least three times. I also created a template for the arrow tip and fin in a drawing program, which I printed on 1/4” plywood on a friend’s CNC router so I could trace these onto the hull. Initially, what worked best for me was to mask off the ends of the cove stripe, use the template to trace each shape in place, and carefully cut out each shape with a sharp Exacto blade. I used a short metal straight edge for the lines and free-handed the curves. It worked surprisingly well but was extremely delicate, and I worried about screwing up the decorations on the hull. In the end, I discovered that I could send the same computer artwork to BoatUS who could reproduce the ornaments exactly for a very reasonable price. The forest green matched my paint so closely I couldn’t tell the difference from more than a few feet away. I decided to paint the boot stripe and the long section of the cove stripe and add use vinyl decals for the ornamental tips.
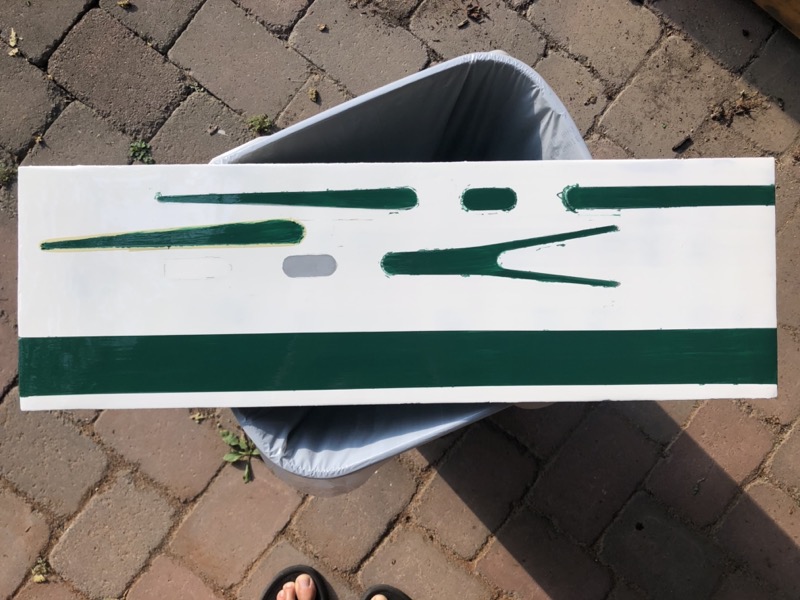
Alexseal strongly recommended gray primer underneath the dark forest green I had chosen for the cove and racing stripes. That meant that each stripe would need to be taped off four times: once to sand, once to apply primer, a third time to sand the primer, and a fourth for the topcoats (removing the tape after sanding is highly recommended). For the sanding coats I used frog tape from the hardware store; for the primer and topcoat I used 3M’s Fine Line 218.
Cove Stripes
The cove stripe was challenging because on the Seabreeze the hull is recessed beneath the stripe (and the ornaments) although on my hull the recess had suffered quite a bit of loss due sanding and resurfacing (both mine and previous renovations). But from what I could tell, the original cove stripe was about 3/4” with round endcaps. The distance from the deck to the top of the stripe was 3.5” for most of the hull except for the final four feet at the bow where it gradually tapered away from the deck to a final distance of 4”. Some of this may have been due to the reshaping of the deck-hull joint we did as part of the toerail renovation.
What worked for me was to mark a 3/4” width with masking tape on an adjustable square which I laid on the deck and marked the hull at 12-16” intervals.
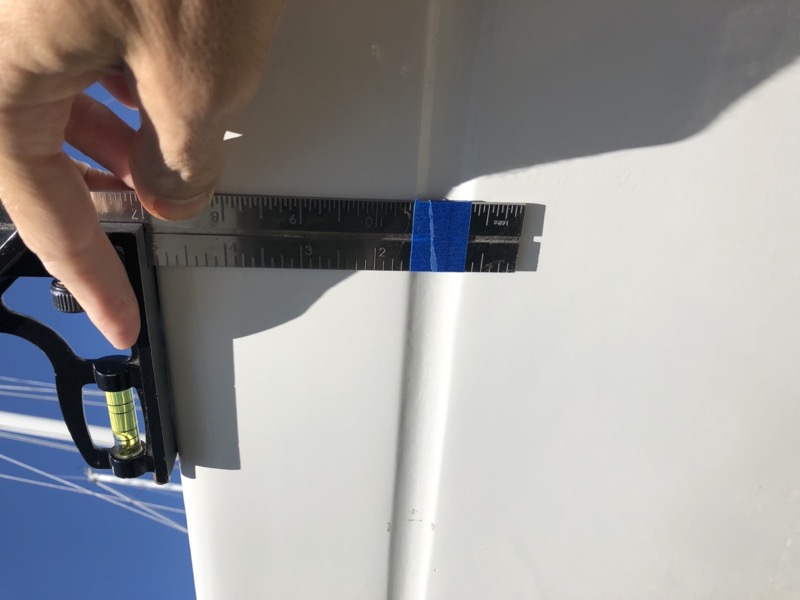
Then I masked off the top and bottom of the stripe, and cut a semi-circle out of the end with an Exacto blade (I used my plywood template, but 3/4” diameter circle of any kind would have sufficed). Then I sanded the area with 320 grit Abranet, trying as best I could to sand up to and over the edge of the tape.
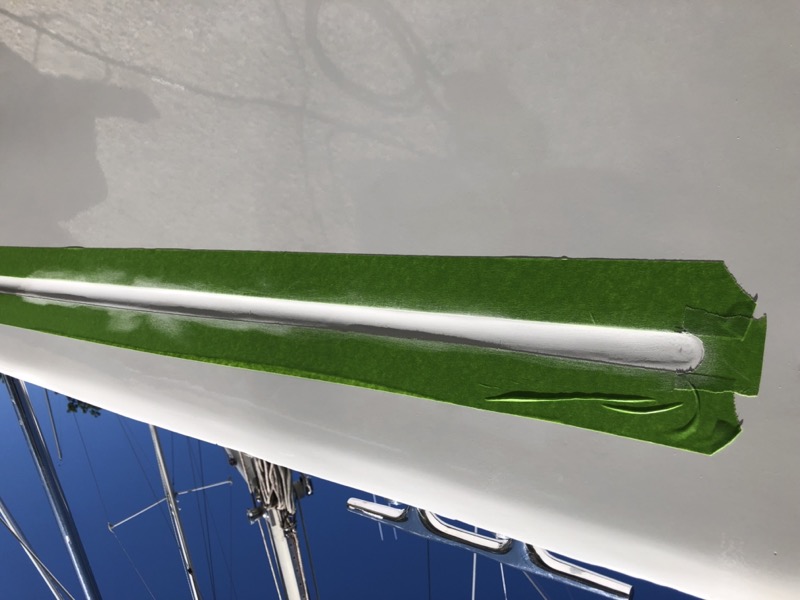
After sanding, I removed the tape, wiped down the cove stripe well–by this time I had switched to Alexseal’s Wipe Down Solvent–and remasked the stripe with 3M Fine Line tape. Although I decided to do the ornaments with decals, the plywood template was still helpful to make sure I cut the semi-circle endcap in the right location.
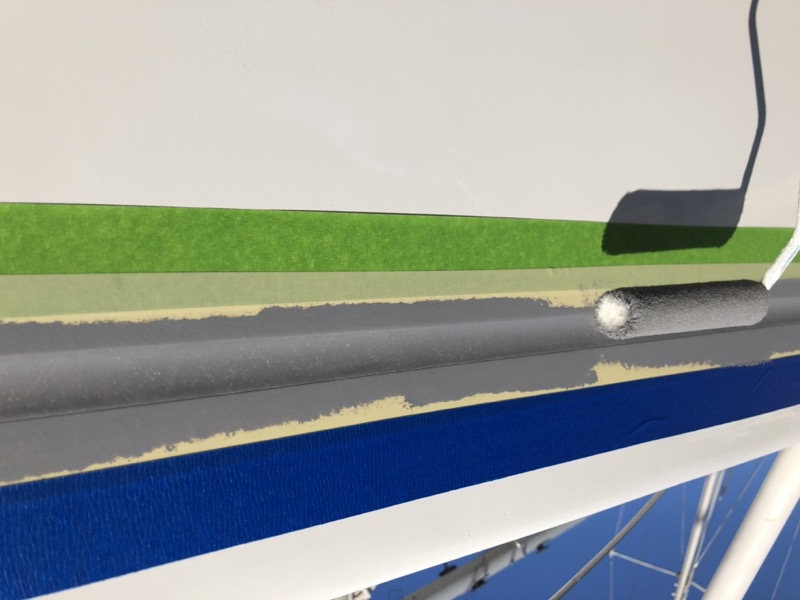
For the primer: I started out using a 1” foam brush (solvent resistant) but found it didn’t hold up well after about 10 minutes. Instead, I ended up going back to the 4” Redtree rollers and loading up the roller as little as possible. I also added a layer of “safety tape” above and below the Fine Line tape. Even with tiny, vertical roller strokes, I got more even coverage and flow than with a foam brush and could apply the primer more quickly. I put on two coats at 90 minute intervals on an 85 degree day.
Boot Stripe
The challenge in marking a boot stripe is that you must compensate for the curve of the hull to paint a stripe that looks even over its entire length. That means the stripe must be wider at the bow and stern than at midship. On a Seabreeze a boot stripe that is 2” at midship comes out closer to 4” at the bow and over 6” at the stern.
There are a few techniques for marking a level bootstripe. The jig I used works if you already have a well-marked waterline as I did. As explained below I actually marked and primed the boot stripe twice with two different jigs to correct some initial mistakes.
My first jig consisted of a dead-flat surface—I used alumimum plate—with a level bubble attached. A good-sized level would have also sufficed. I had determined that I wanted my boot stripe to be 2 1/4” at mid ship so I cut a block to that width. Then I placed the edge of the aluminum plate against the waterline, adjusted its angle until the bubble indicated it was level, slid the block against the hull and marked the top of the block with a pencil. I did this at 12-16” intervals. As the curve of the hull became more pronounced, the boot stripe width increased.
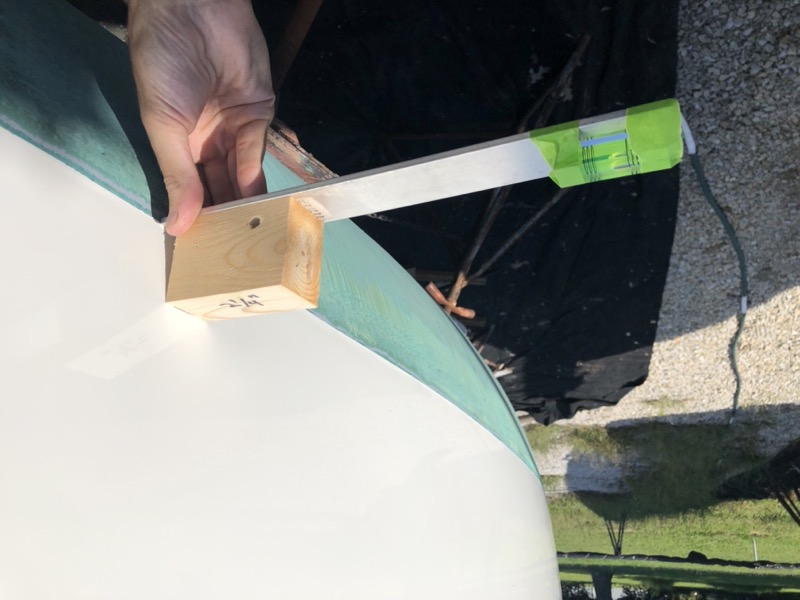
Then I taped off the boot stripe (frog tape), sanded the top coat, removed and retaped (Fine Line), and applied primer by roller as described above.
Several issues came to light when I removed the tape and inspected my work. First, I had been a bit hasty in the second pass of taping and in several places the tape was too low. The result was a handful small streaks (1/16th” wide or less) that were sanded but not primed. Taping a white surface is tough; I should have gone slower and worn by reading glasses!
The second issue was that I should have marked the hull more frequently around the stern where the stripe width variations were greatest. The first time I made marks at no more than 12” intervals, and the stripe around the stern looked like a series of straight lines instead of a smooth arc.
Third, I hadn’t taken into account that the boat wasn’t level from port to starboard on its jack stands. The level in my jig didn’t account for that. As a result the stripe was ever slightly wider on starboard than on port. It wasn’t really noticable unless you looked for it, and even then only at the stern where the differential was largest in absolute terms, but it was annoying that I had failed to anticipate it.
None of these issues were fatal flaws in and of themselves, but taken together, I decided to try again. This time, I used a 2 1/2” block (producing a slightly thicker stripe to cover my mistakes), and an improved measuring jig. I made more frequent marks around the stern, took my time, and remembered my glasses.
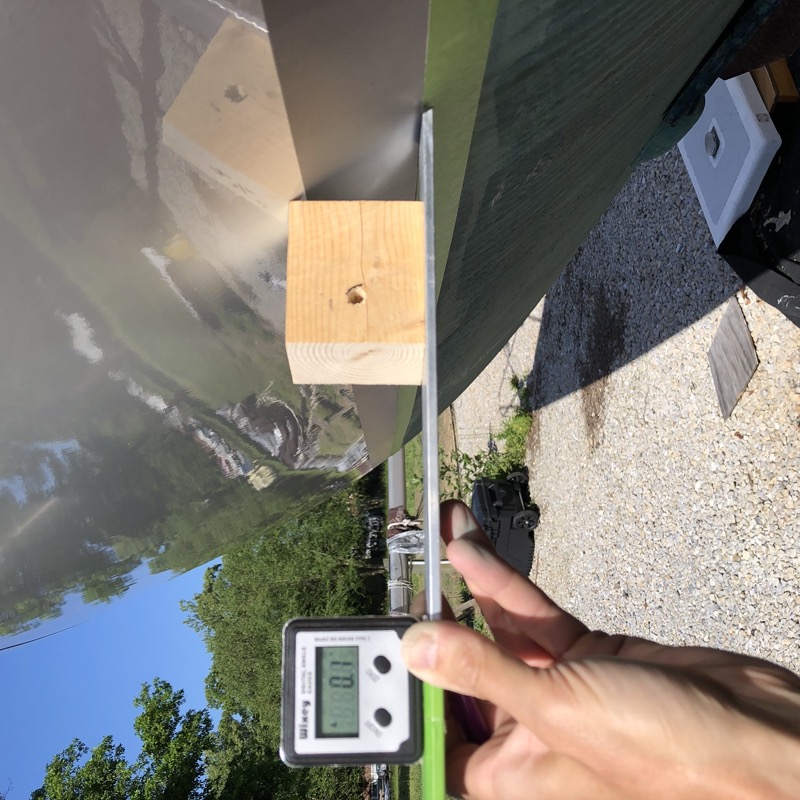
Here is the improved jig. Version 2 uses an electronic level that is easier to read. Importantly, it lets me set the zero point relative to the boat, which I did by zeroing the level while it rested on the cockpit floor, so that the stripe was a consistent width on both sides.
Finish Coats
The finish coats were just a matter of taping of the stripes (frog tape), sanding the primer, removing and retaping (Fine Line) as before, and painting. Before applying the final tape I wiped down the sanded areas with wipe down solvent and let it flash off so it wouldn’t affect the adhesive.
I had tested a variety of application methods on my test board. For whatever reasons, none of the brushes gave me satisfactory results, and I ended up staying with my 4” rollers and used a set of very short vertical strokes.
Two coats of Forest Green over gray primer produced excellent coverage. I could see a bit of “orange peel” at distances of 1-3 feet, but it looked great from any greater distance. By this point I was growing tired of repeated sanding and taping, and I was skeptical that if I sanded before the final coat (as I had done for the white) that I would be able to tape it accurately. I decided to declare victory after two coats.
It was early evening when I removed the tape and got an unpleasant surprise. Even using Fine Line, the tape lines had leaked on both stripes! It was pretty ugly even at a distance. I was tired, a bit panicked, and had run out of daylight.
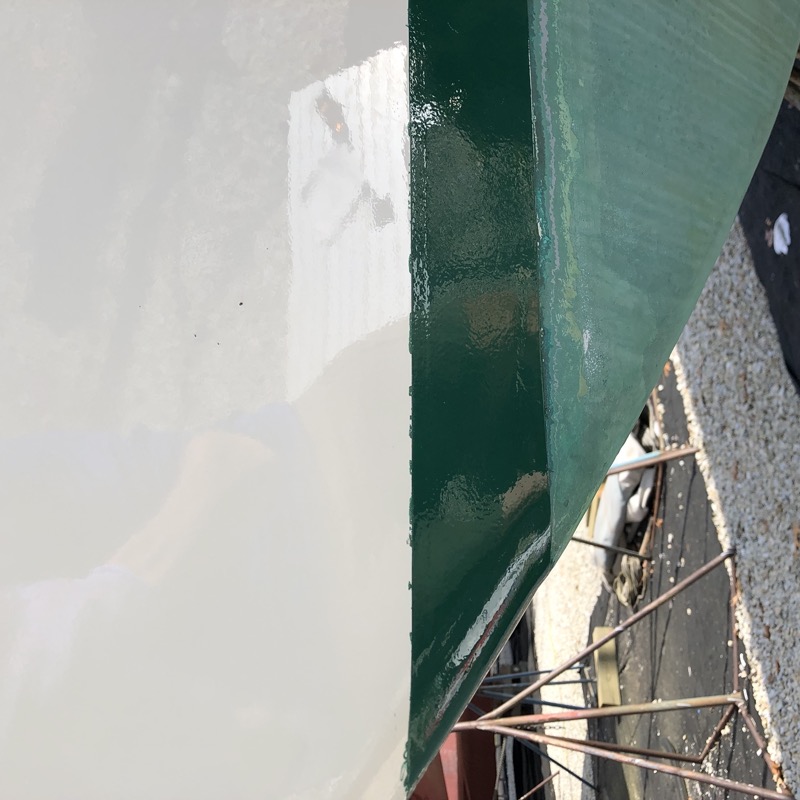
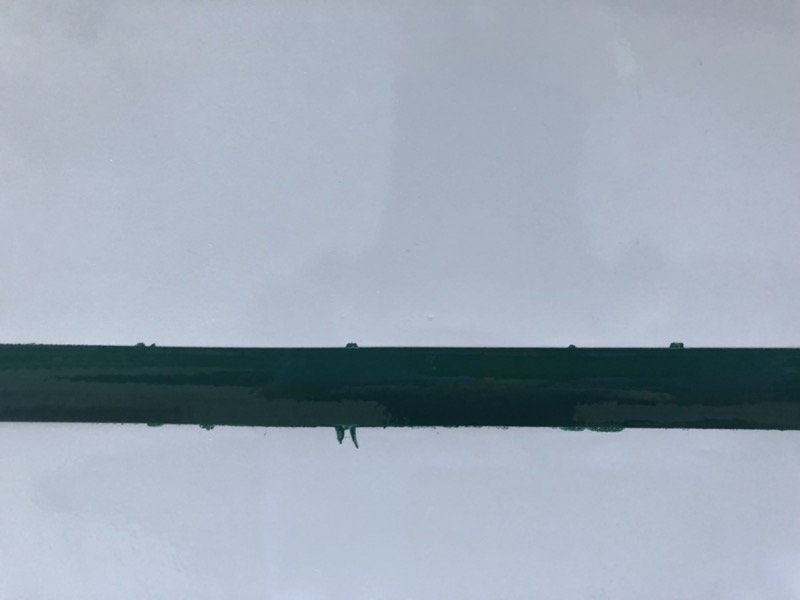
My best explanation is that the primer had added at least 2-3 mils to the thickness of the stripes, creating a bevel to which the tape did not adhere evenly. I’m told that more experienced painters can correct for this during taping, but taping has never been my strength.
I ended up getting lucky. The next morning was clear and cool. The paint had partially cured overnight but was still tender, and the spots that had bled through the tape had not adhered well since the surface beneath was not sanded. If I was careful, I found I could fairly easily lift these off with a razor blade. The cool morning temperatues seemed to help quite a bit. Repairs got more difficult in the late morning as the sun warmed the hull, but by then I was nearly finished.
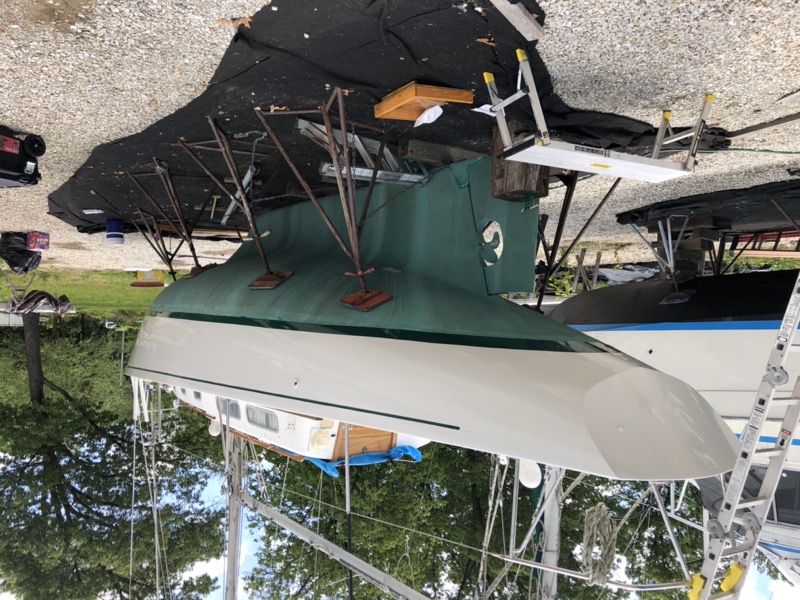
Here’s the finished result.
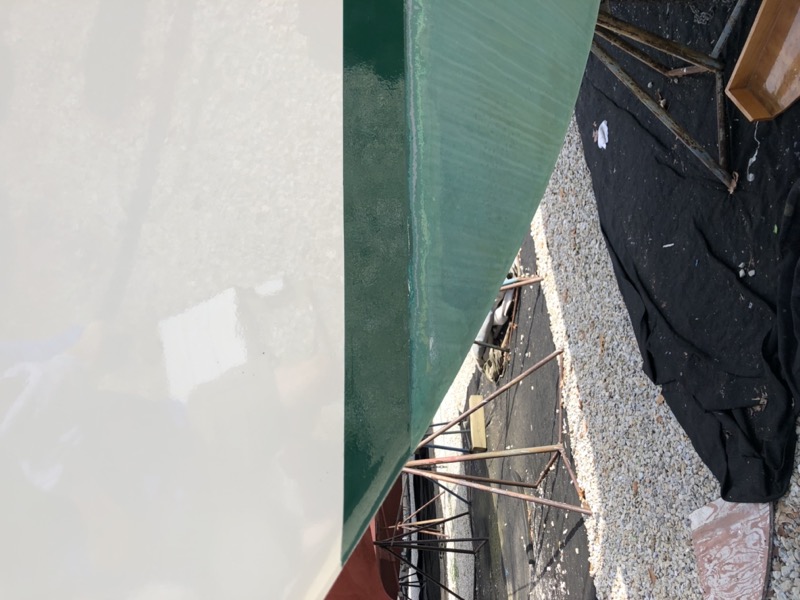
And here’s how it looks from a distance.
The last step was to apply the decals mentioned previously for the feathers and tips.
